
Toyota MR2
1. A Car That Came Home
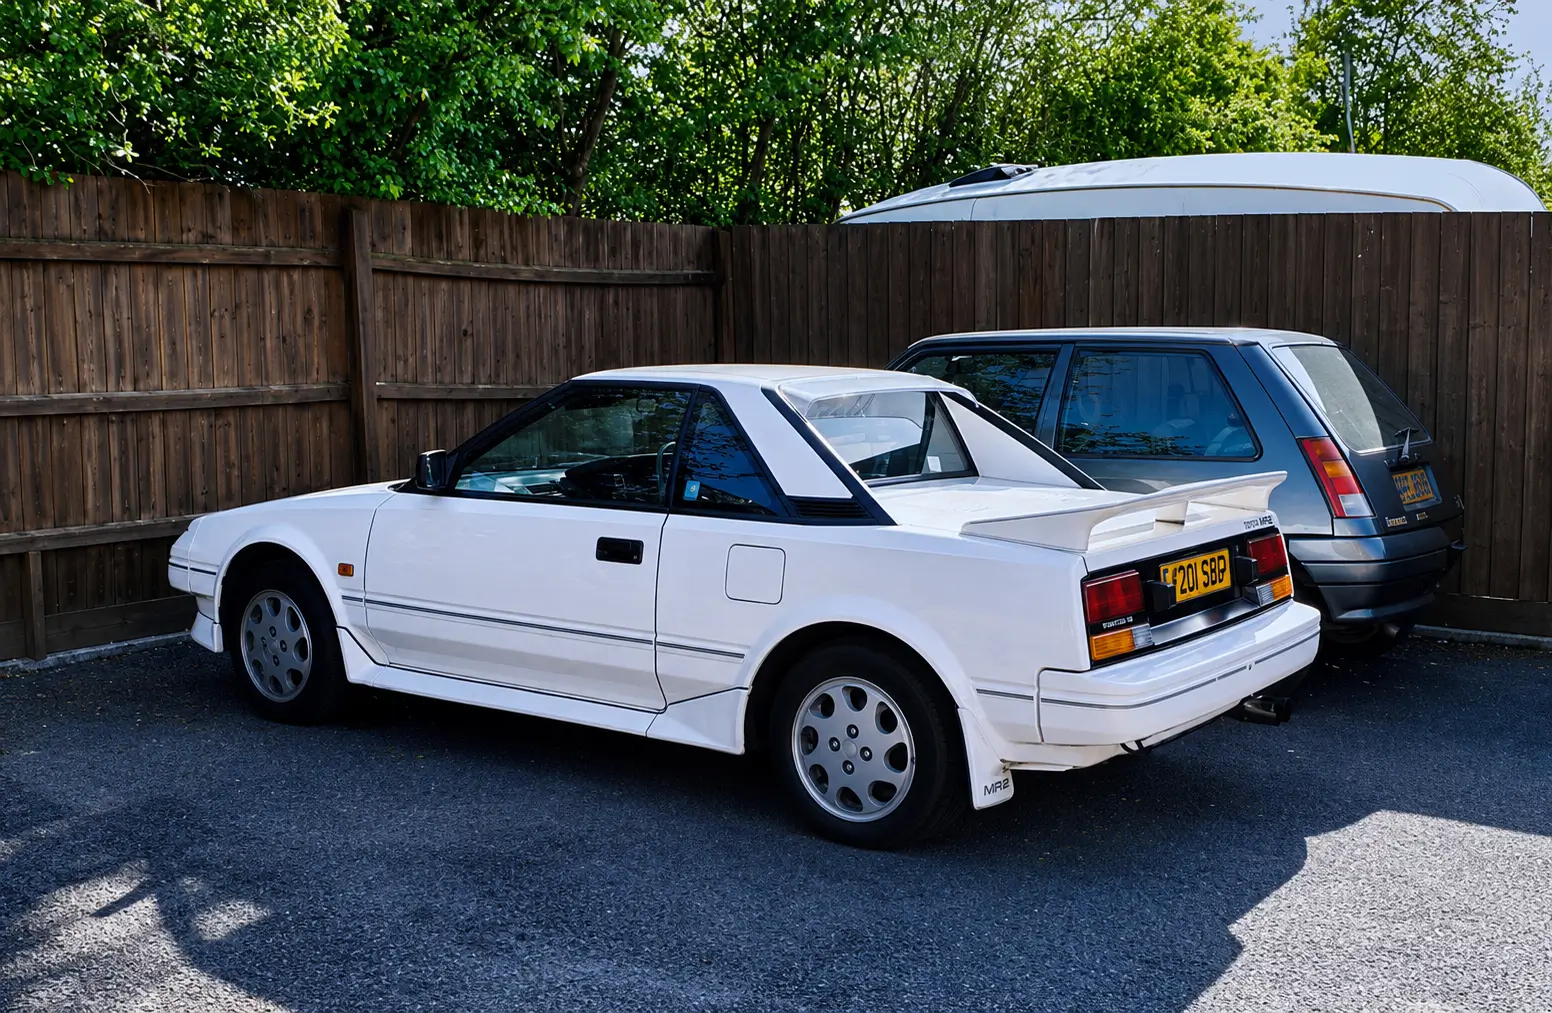
Some cars are simply transport, while others become part of the family. This Toyota MR2 certainly falls into the latter category.
Our customer, Nigel, first owned the car during the 1990s and enjoyed every minute behind the wheel. However, with the arrival of his daughter, practicality had to take priority and, in 2001, the MR2 made way for a family car.
Almost as soon as it had gone, Nigel knew he’d made a mistake. He had never regretted selling a car before, but this one was different. The MR2 remained firmly in the back of his mind for years, and he often wondered what had become of it.
After selling his boat in 2020, Nigel decided it was time to own another MR2. Rather than rushing into the first one he found, he patiently searched for a car as close as possible to
the one he remembered.
An advert eventually caught Nigel’s eye for a white MR2 for sale in Yorkshire. At first glance, it looked like any other car, but one photograph immediately stood out. The image wasn’t particularly clear, yet after zooming in, the registration number looked strangely familiar.
Despite more than two decades having passed, there was no mistaking it.
He had found his original MR2.
Nigel travelled to Yorkshire to inspect the car in person, and it didn’t take long for the deal to be done. The MR2 was finally heading home to Dorset.
Against all the odds, he had found his original MR2.
Naturally, the deal was done, and the car made the journey back home to Dorset.
Unfortunately, the intervening years had not been kind to it. Life in the harsher northern climate had taken its toll, with corrosion affecting the bodywork, while mechanically the car was no longer performing as it should. Returning the MR2 to the condition Nigel remembered would require a comprehensive programme of restoration.
Fortunately, projects like this are exactly what we specialise in.
2. The Restoration Begins
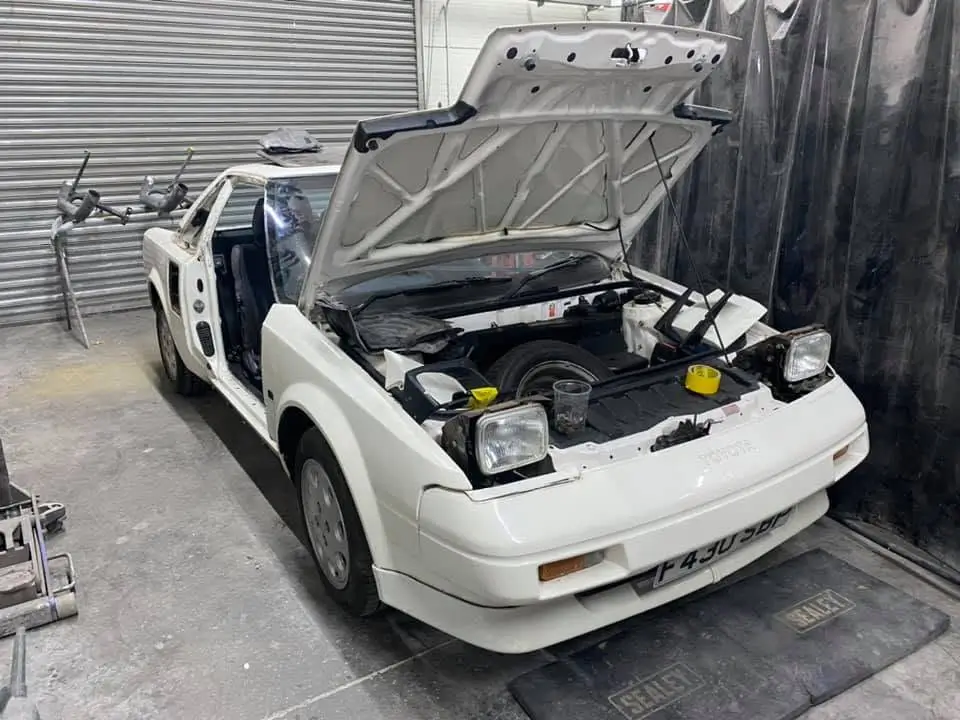
Before we could accurately assess the condition of the MR2, the dismantling process had to begin.
Although the car looked presentable at first glance, experience has taught us that appearances can often be deceptive. Corrosion frequently develops behind body mouldings, trim panels and plastic components, remaining hidden until the vehicle is stripped.
The first stage was to carefully dismantle the car, removing the exterior trim, lighting, bumpers, interior components and other bolt-on parts. Each item was catalogued and stored safely, ready for reassembly later in the project.
Only by progressively stripping the MR2 back could we gain a true understanding of its condition and plan the restoration correctly. As more components were removed, the extent of the work ahead gradually became clear.
3. Stripped Back to the Bare Shell
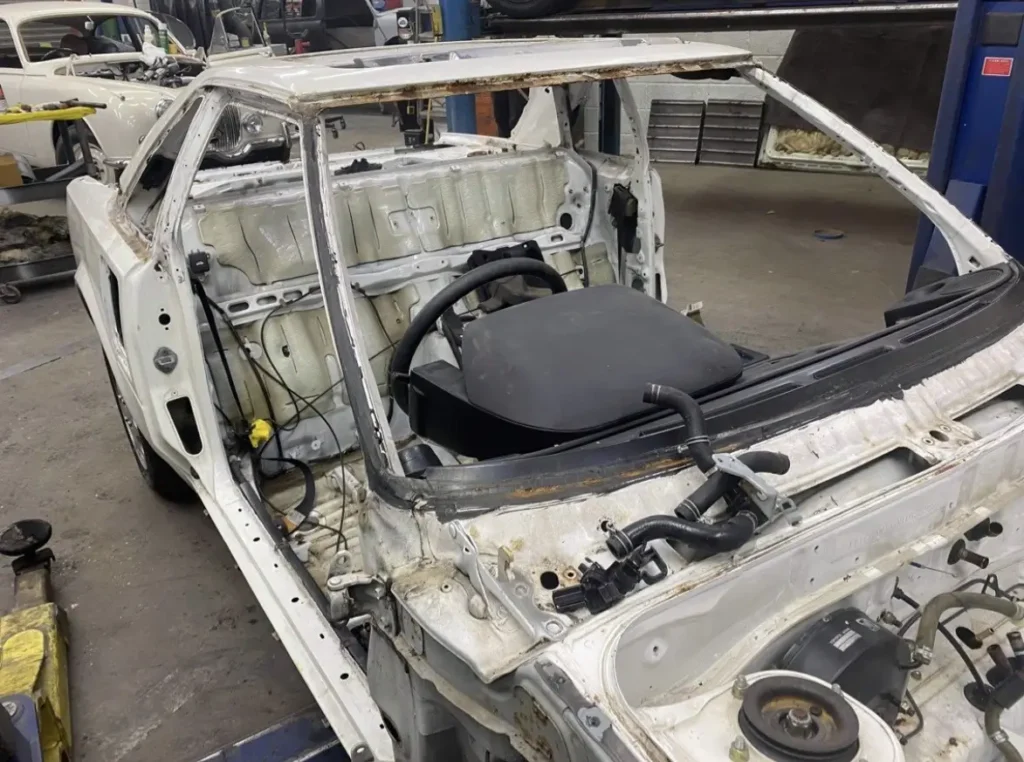
With the dismantling complete, the MR2 had been reduced to little more than a rolling bodyshell. The engine, transmission and all remaining mechanical components had been removed, allowing us to inspect every part of the structure without obstruction.
This is the stage where the true condition of any restoration project becomes apparent. While some areas were exactly as expected, others revealed corrosion that had remained hidden for many years beneath trim panels, seals and factory coatings.
Stripping the car back to this level allowed us to accurately assess every repair required and ensure nothing would be overlooked. Once the inspection was complete, we could plan the structural repairs that would return Nigel’s MR2 to the solid, rust-free condition it deserved.
4. Uncovering the Hidden Corrosion
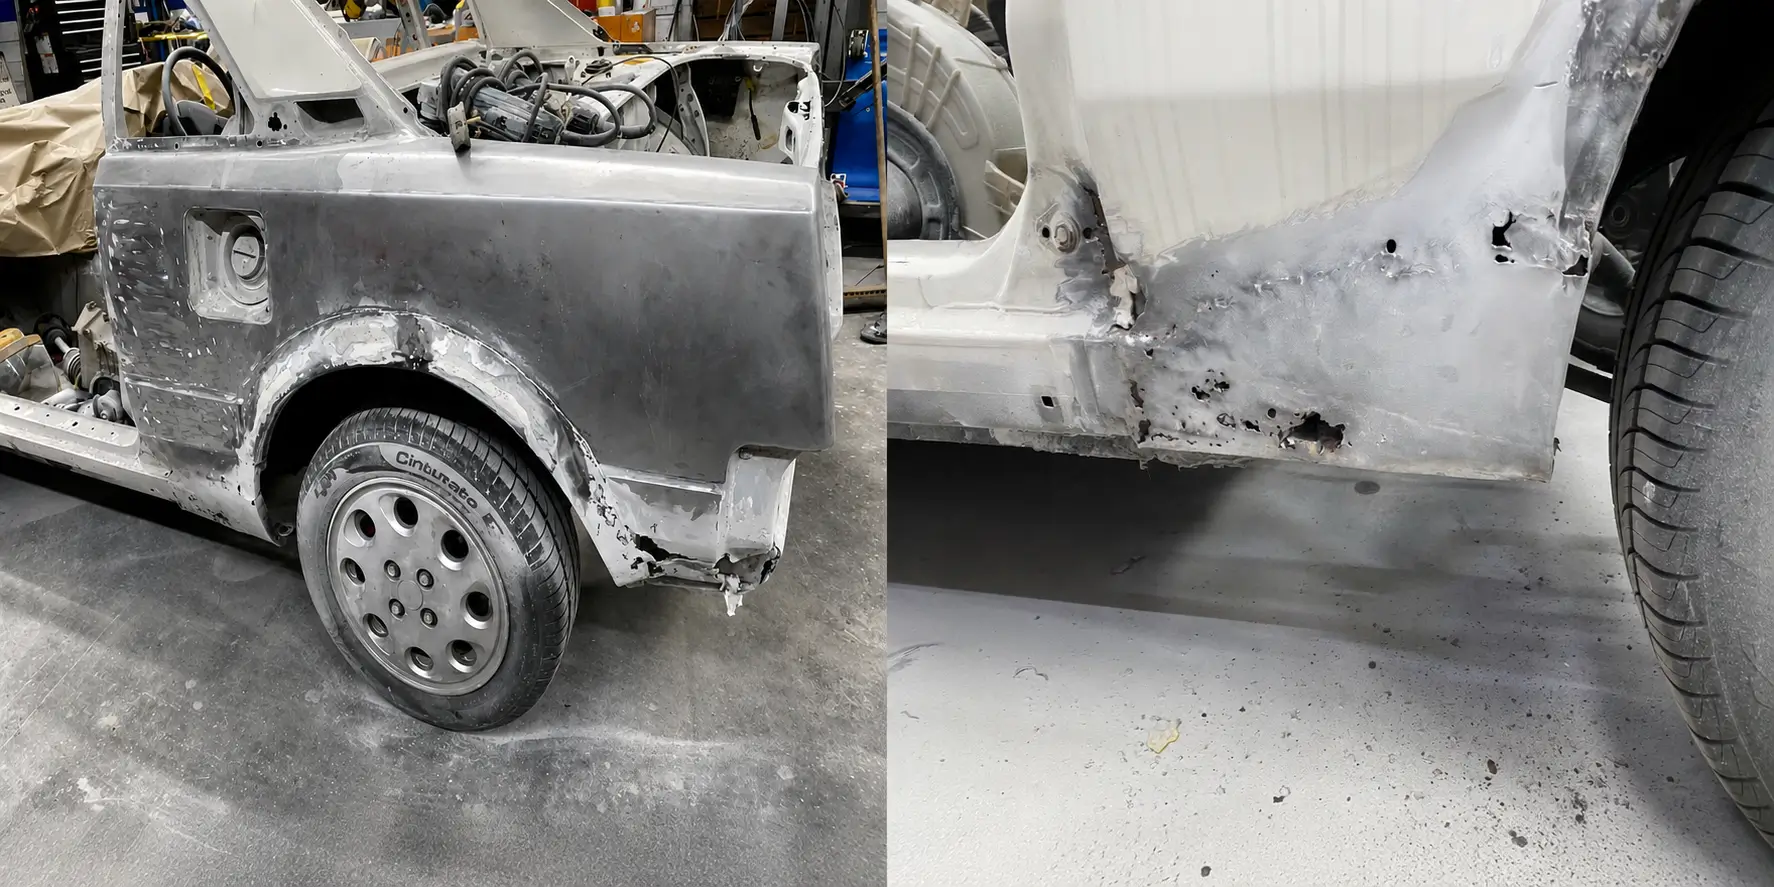
As the paint was stripped away, the true extent of the previous repairs began to emerge.
What initially appeared to be solid bodywork was, in places, hiding significant corrosion beneath layers of body filler. Rather than removing the rust, earlier repairs had simply concealed it, allowing corrosion to continue spreading unseen beneath the surface.
It quickly became clear that localised repairs would not be enough. To properly assess the condition of the shell and ensure no further hidden corrosion remained, the decision was made to strip the entire bodyshell back to bare metal.
Although this inevitably added time to the project, it was the only way to ensure all corrosion could be identified and repaired correctly. Only by taking this approach could we be confident that no corrosion would remain hidden beneath the finished paintwork.
5. Back to Bare Metal
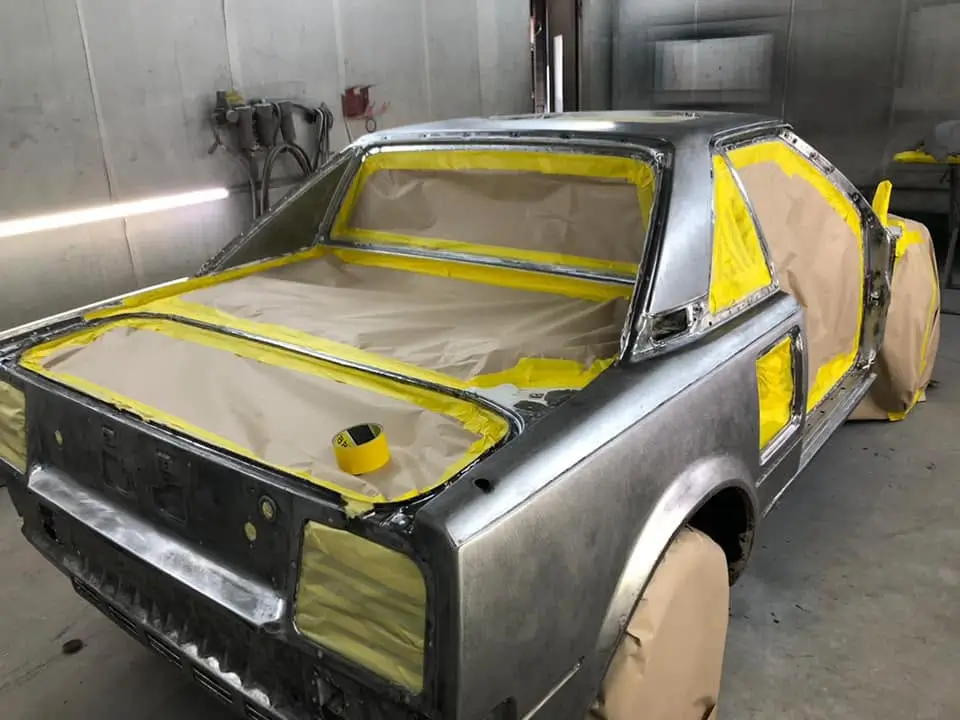
With the decision made, the entire bodyshell was stripped back to bare metal.
Removing every trace of paint, filler and previous repairs allowed us to inspect the shell exactly as it left the factory. There was nowhere left for corrosion to hide, giving us complete confidence that the full extent of the work had been identified.
Although stripping a shell back this far is both time-consuming and labour-intensive, it provides the best possible foundation for a lasting restoration. Previous repairs could now be properly assessed, while every area requiring attention had been fully exposed.
With the shell completely stripped, the assessment was complete. Before any structural repairs could begin, however, the freshly exposed steel first needed to be protected.
6. Protecting the Bare Steel
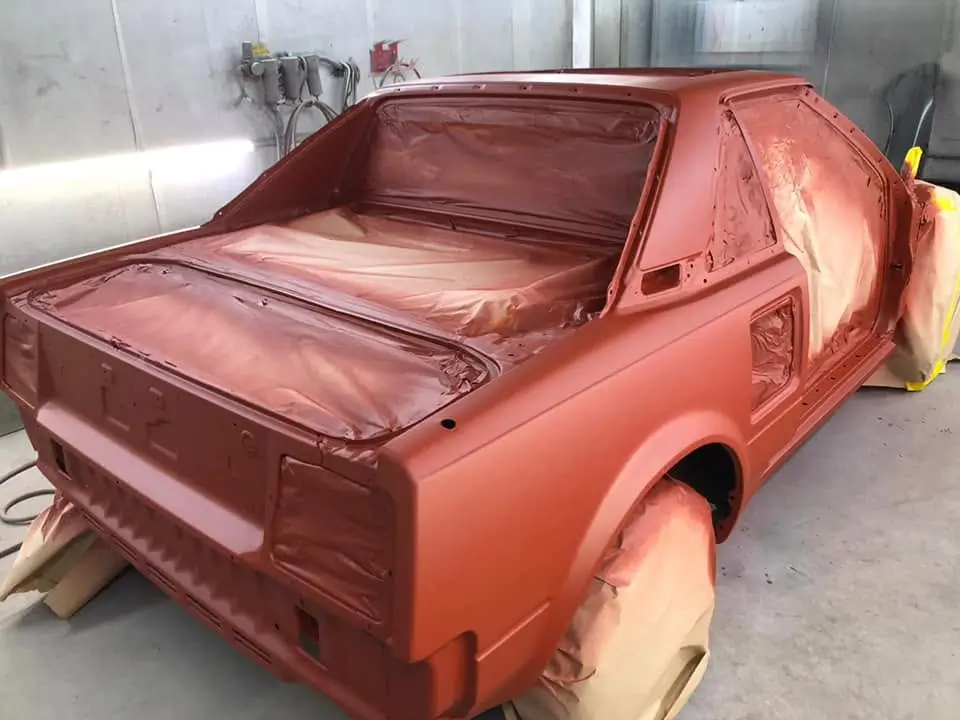
Before any welding or fabrication work could begin, the freshly stripped bodyshell had to be protected.
Once steel has been taken back to bare metal, it can begin to develop surface corrosion surprisingly quickly. To prevent this, the entire shell was coated in weld-through primer.
Unlike conventional primers, weld-through primer is specially formulated to allow repairs to be welded directly through the coating. This protects the steel throughout the fabrication process while also providing corrosion resistance between overlapping panels and joints that become inaccessible once repairs are complete.
Although this stage is often overlooked, it is essential to achieving a long-lasting restoration. With the shell fully protected, we could begin cutting out the corrosion and fabricating new steel repair sections, confident that every repair was being carried out on properly prepared metal.
7. Structural Repairs Begin
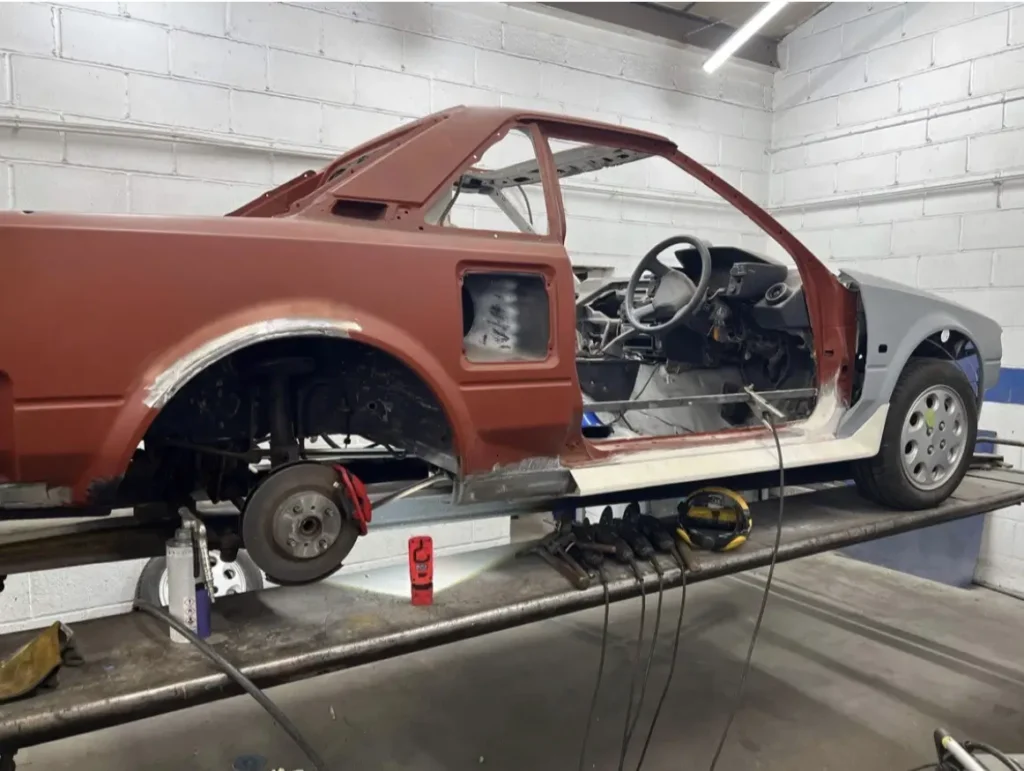
With the bodyshell fully protected in weld-through primer, the structural restoration could begin.
Every corroded section was carefully cut away before replacement panels were fabricated and welded into place. Where suitable repair panels were available, they were used, but many sections had to be hand-made to recreate the original shape, strength and appearance of the factory steelwork.
As with many classic cars, sourcing replacement panels proved to be a challenge. Fortunately, Nigel was fully involved throughout the restoration and proved invaluable in tracking down rare components from specialist suppliers around the world. Some replacement panels even made the journey from New Zealand, helping ensure the repairs were completed using the best parts available rather than compromising with poor-quality alternatives.
Restoring a car like this is never simply a case of fitting new panels. Each repair had to align perfectly with the surrounding bodywork, preserving the original lines of the MR2 while returning the shell to its original structural integrity. The result would be a bodyshell that was not only visually correct but every bit as strong as when it left the Toyota factory.
8. Sealed in Epoxy Primer
With all of the structural repairs complete, the bodyshell was thoroughly prepared before receiving a full coat of epoxy primer.
Unlike conventional primers, epoxy primer provides an exceptional barrier against moisture and corrosion, sealing the bare steel and newly repaired areas from the elements. Applying it at this stage also created a stable, uniform surface on which the next phase of the restoration could begin.
Only once the shell had been sealed in epoxy primer could the detailed body finishing begin. Minor imperfections were carefully corrected using only the minimum amount of fine filler where required, before the shell was shaped and block-sanded to achieve the crisp panel lines and smooth, even surfaces expected of a high-quality restoration.
This stage demands patience as much as skill, but it forms the foundation of the final paint finish. No amount of paint can hide poor preparation, so every hour invested here would ultimately be reflected in the finished car.
9. The Mechanical Rebuild
While our bodyshop team concentrated on restoring the bodyshell, our mechanical technician was equally busy rebuilding the engine.
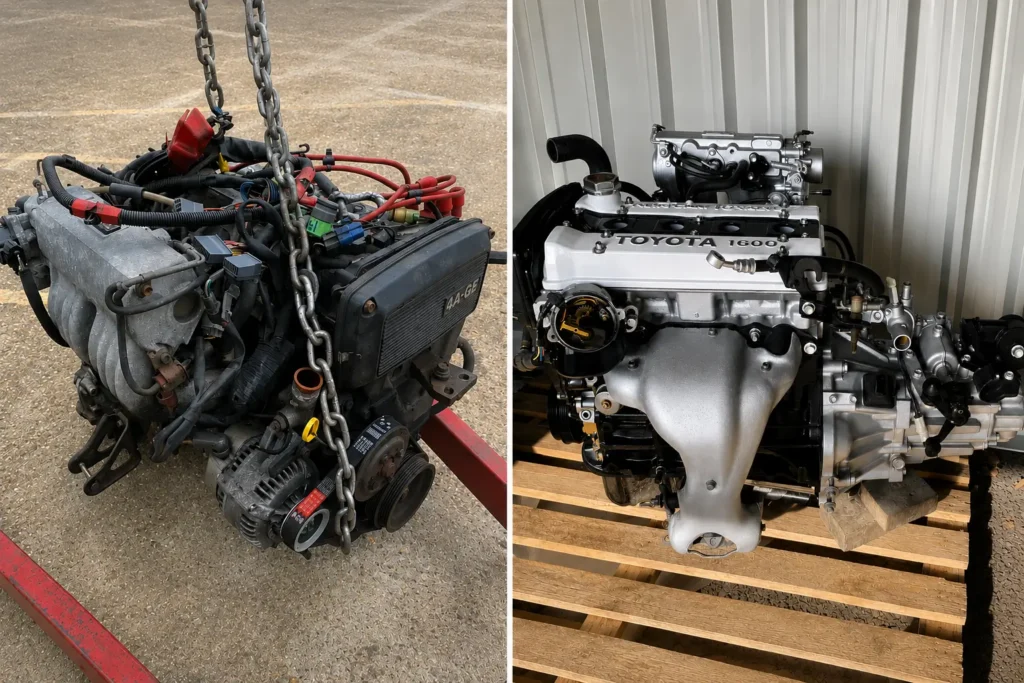
Once stripped down, it became clear that the years had taken their toll. The engine was in poor condition and would require a complete rebuild rather than a simple refresh.
Both the cylinder block and cylinder head were sent away for specialist engineering work before the engine was meticulously rebuilt using a range of new and uprated components. Every bearing, seal and gasket was renewed, while ancillary components were carefully inspected, refurbished or replaced wherever necessary to ensure long-term reliability.
With the rebuild complete, the engine was refinished in a colour matched to the bodywork, creating an engine bay that would look every bit as impressive as the rest of the finished car.
By the time the restoration was complete, the engine not only looked factory fresh but was built to provide many years of dependable performance, allowing Nigel to enjoy driving his rediscovered MR2 with complete confidence.
10. High-Build Primer and Final Body Preparation
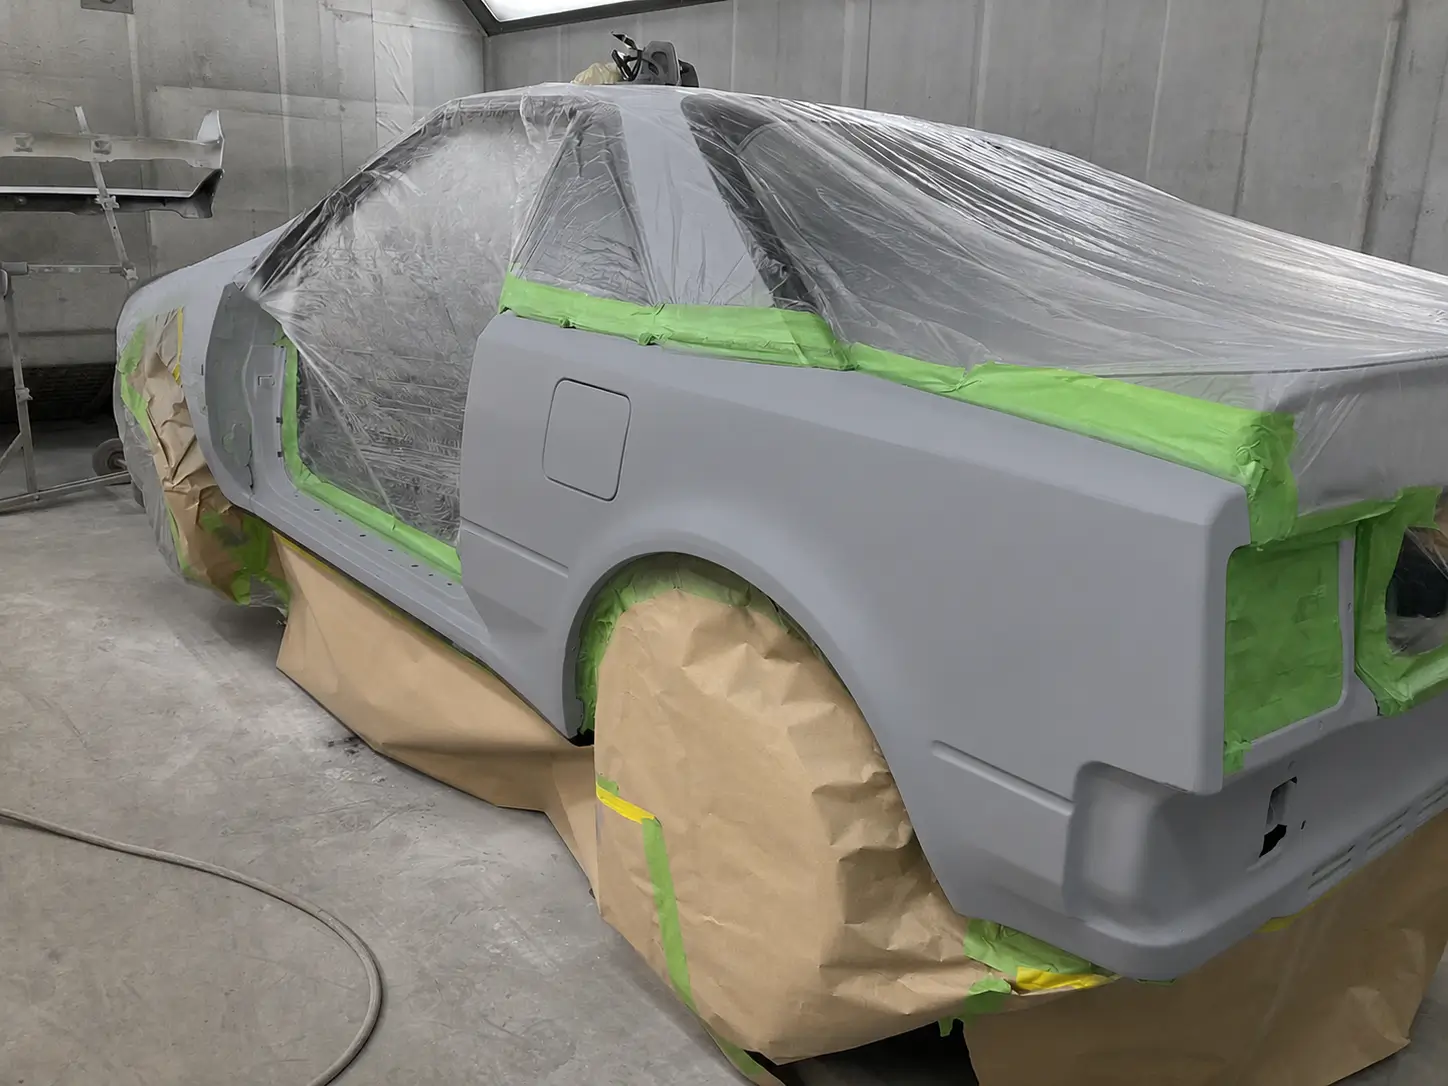
With the shaping work complete, the bodyshell received several coats of high-build primer.
This stage serves two purposes. It provides a uniform surface across the entire shell while allowing the bodywork to be hand block-sanded to an exceptionally high standard. Unlike machine sanding, block sanding follows the contours of the body, highlighting even the slightest imperfections and ensuring the panels remain perfectly straight.
The shell was repeatedly guide-coated and hand-finished, with each stage of sanding revealing any remaining high or low spots. This process continued until every panel met our exacting standards.
Although incredibly time-consuming, it is this level of preparation that ultimately determines the quality of the finished paintwork. By the time the shell left the preparation stage, it was ready to receive its final colour, with crisp panel lines and smooth, even surfaces worthy of this increasingly rare Toyota MR2.
11. Into Colour
With months of metalwork, fabrication and painstaking preparation complete, the MR2 was finally ready for one of the most rewarding stages of the restoration.
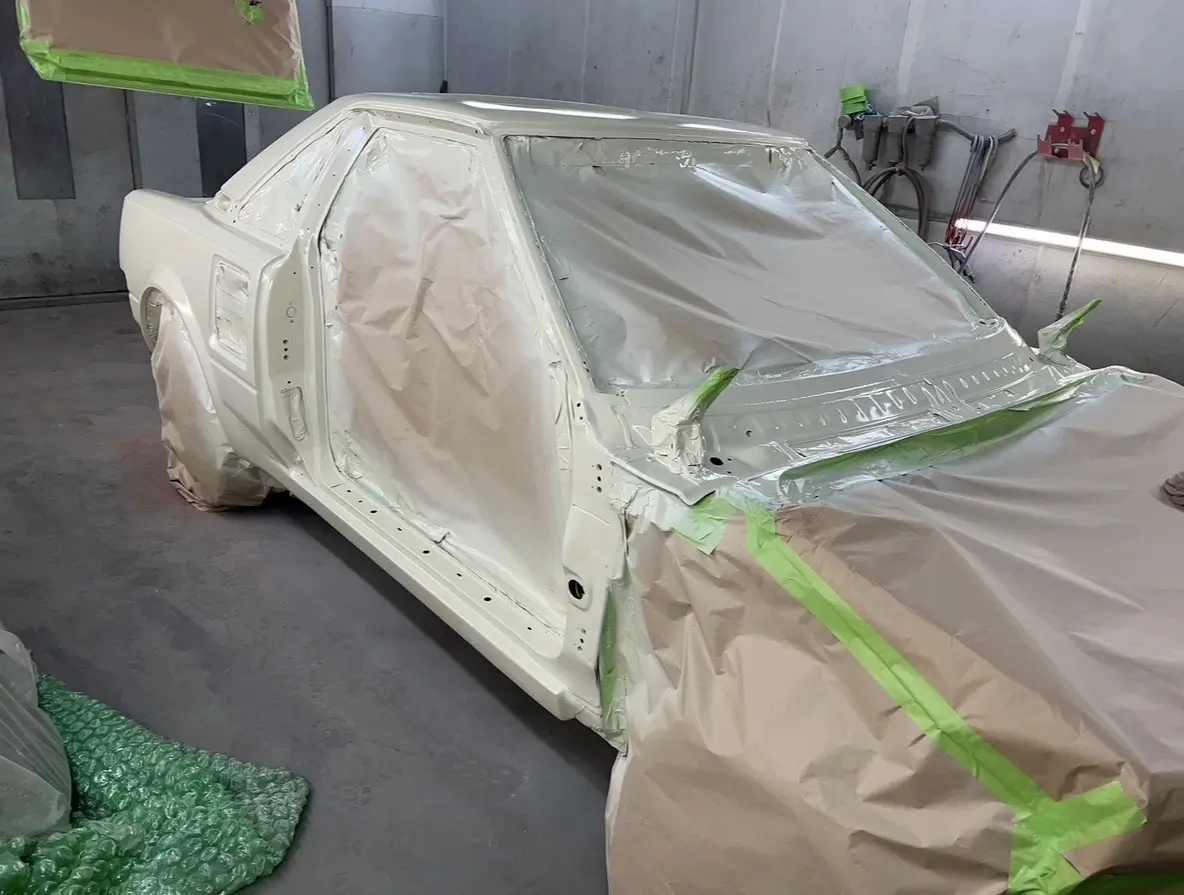
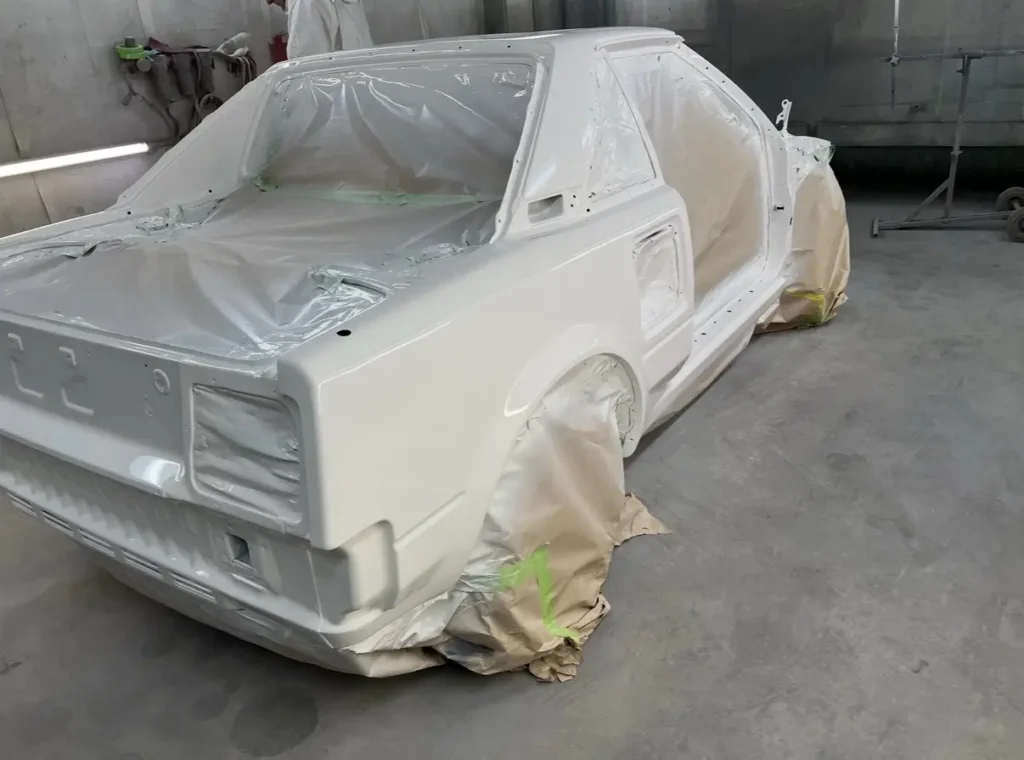
The bodyshell was carefully masked before being refinished in its original Toyota Super White, applied in our low-bake spray booth using modern paint materials while remaining faithful to the car’s factory appearance.
Once the paint had fully cured, the finish was meticulously hand flatted and machine polished. This process removes even the slightest imperfections in the paint surface, producing exceptional depth, clarity and a mirror-like finish that simply cannot be achieved straight from the spray gun.
Seeing the shell emerge in gleaming white marked a major milestone in the project. After countless hours of careful craftsmanship, Nigel’s long-lost MR2 was finally beginning to look like the car he remembered all those years ago.
12. Reassembly Begins
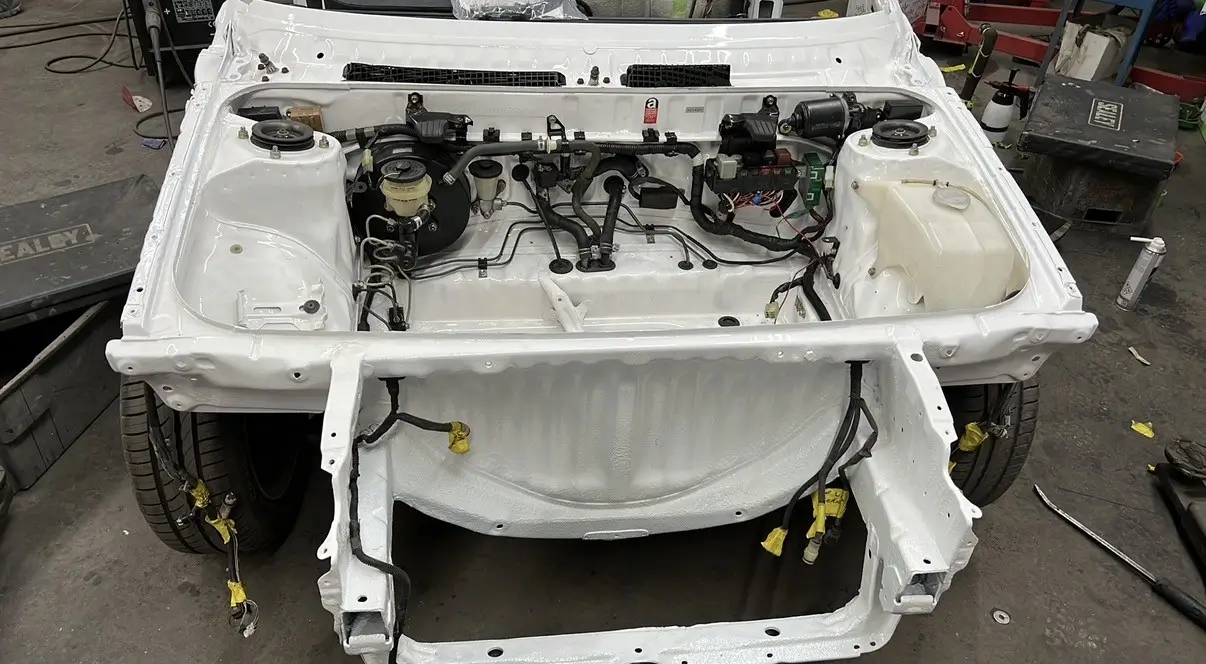
With the paintwork complete and polished to a mirror finish, the restoration entered one of its most satisfying stages – putting the MR2 back together.
Every component was thoroughly inspected before refitting. Parts that could be restored were carefully cleaned and refurbished, while anything showing excessive wear or corrosion was replaced to ensure the finished car looked and performed as well as it should.
The suspension was completely rebuilt using new components and uprated polyurethane bushes throughout, providing improved durability and more precise handling while retaining the character of the original car. A complete new braking system was also installed, giving Nigel the confidence that the MR2 would stop every bit as well as it would go.
As the freshly restored components found their way back onto the immaculate bodyshell, the transformation was unmistakable. After months of careful restoration, Nigel’s long-lost MR2 was finally beginning to look like a complete car once again.
13. Every Detail Matters
The same care taken with the bodywork continued underneath the car.
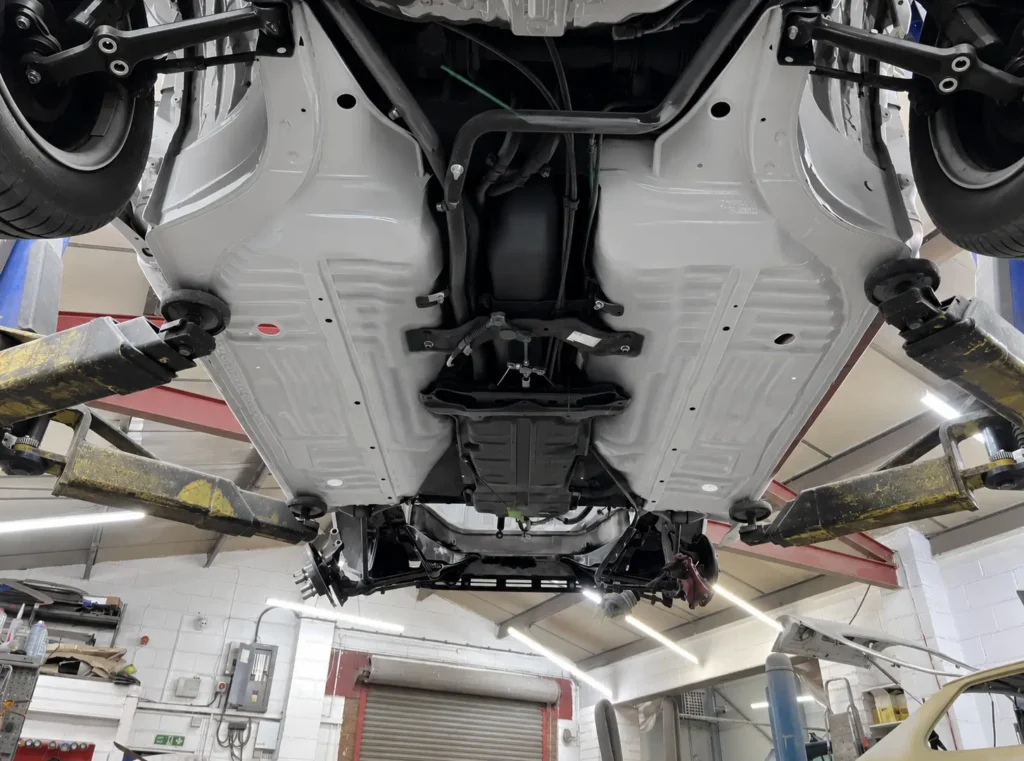
Once all of the structural repairs had been completed, the underside was coated in a durable stone chip coating to provide long-term protection against road debris and corrosion. It was then refinished in the original Toyota Super White, recreating the appearance the car would have had when it first left the production line.
Every suspension component, subframe, brake assembly and fixing was either restored, refinished or replaced as required before being carefully reassembled onto the restored bodyshell.
While an immaculate paint finish is what most people notice first, the underside often reveals the true quality of a restoration. The result is a car that is every bit as impressive underneath as it is on the outside, reflecting the same standard of workmanship throughout.
14. The Finished Article
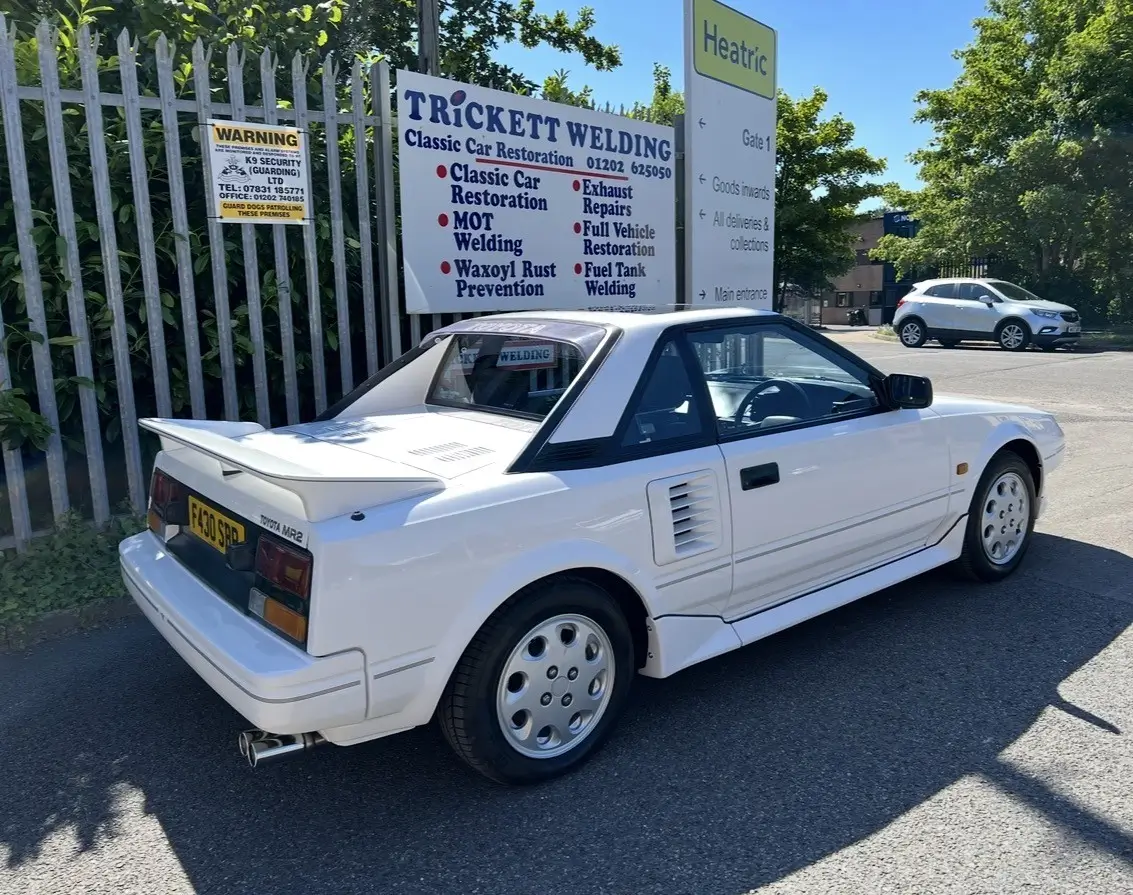
After many months of careful planning, skilled craftsmanship and countless hours of dedicated work, Nigel’s long-lost MR2 was complete.
What had returned to us as a tired, corrosion-ridden sports car had been transformed into a vehicle that looked every bit as good as it did when it first left the Toyota factory. From the flawless Toyota Super White paintwork to the fully rebuilt engine, restored underside and carefully refurbished components, every aspect of the restoration reflected the care and skill invested throughout the project.
More importantly, it was once again the car Nigel remembered.
More than twenty years after reluctantly saying goodbye, he was back behind the wheel of the very same MR2 he had once thought was lost forever.
Some restorations preserve a car.
This one brought it home.
15. A Restoration to Be Proud Of
The true measure of any restoration is not when it leaves the workshop, but how it is enjoyed afterwards.
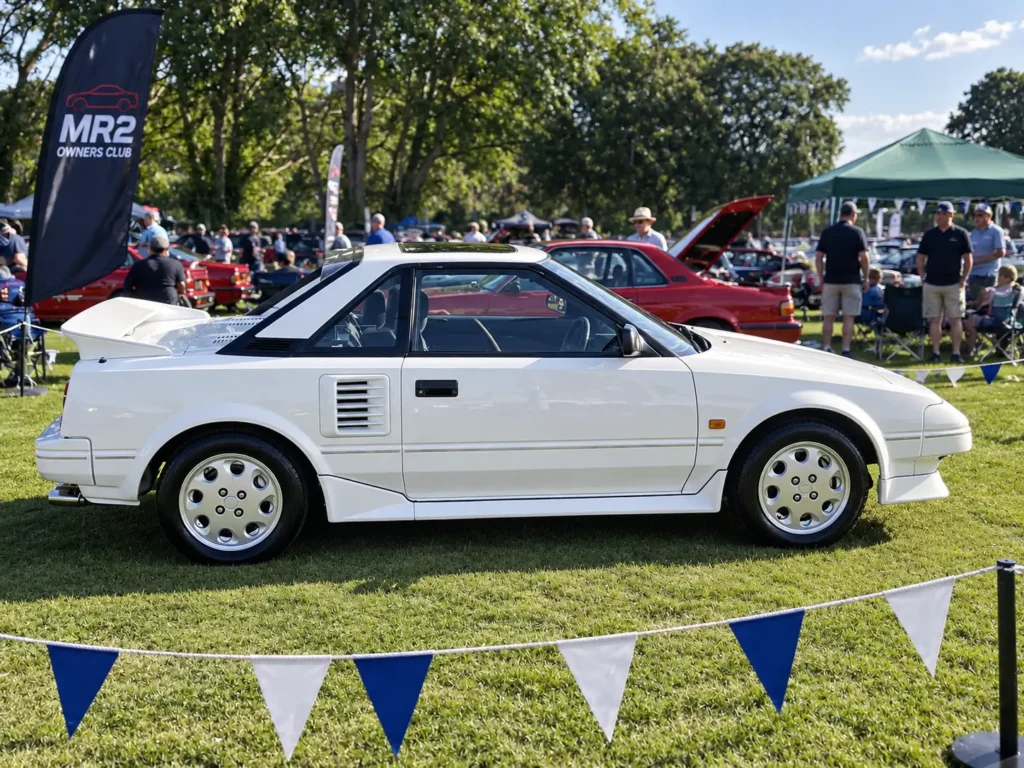
Today, Nigel’s MR2 regularly attends classic car events and owners’ club meetings, where it attracts the admiration of fellow enthusiasts and proudly takes its place among some of the finest examples of the marque. It is a fitting reward for the countless hours invested in returning the car to the condition it deserves.
For us, this project was about far more than repairing corrosion or rebuilding mechanical components. It was about preserving a piece of automotive history and reuniting an owner with a car he never expected to see again.
Seeing Nigel proudly displaying his MR2 at shows, knowing it has been returned to the road to be driven, admired and enjoyed once more, is immensely rewarding.
Nigel was also closely involved in the restoration of the famous Sunbeam 1000HP world land speed record car, producing specialist components essential to its restoration while working alongside the team at the National Motor Museum. When the car was ceremonially loaded for shipment to Daytona Beach—the scene of its record-breaking runs in 1927—Nigel invited our proprietor, Nigel Trickett, to attend the event.
For such a special occasion, Nigel chose to arrive in his cherished Toyota MR2. After everything the car had been through—and everything it meant to its owner—it seemed entirely fitting that it should be part of another memorable chapter in motoring history.
Everyone at Trickett Welding was immensely proud to see one of our restorations present at such a significant moment in automotive history. Knowing that the very car we had helped return to its former glory was there to witness the next chapter in the remarkable story of the Sunbeam 1000HP made this project even more special for the whole team.
 01202 625050
 info@trickettwelding.co.uk