
Jaguar Mk2 – Bringing a Family Heirloom Back to Life
Some restorations are about saving a classic car. Others are about preserving family history.
When Steve inherited this beautiful Jaguar Mk2 from his late uncle, he knew it deserved another chance. The Jaguar itself had a fascinating history, having originally been owned by the Rolls-Royce Motor Company in Crewe, where it served as transport for one of the company’s senior executives. Steve’s uncle, who also worked for Rolls-Royce, later purchased the car and enjoyed it for many years before it was eventually laid up in a garage, remaining untouched for a considerable period.
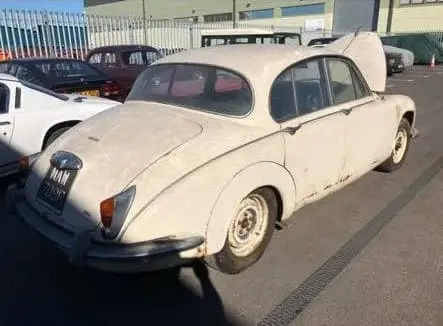
After Steve inherited the Jaguar, it was transported from Crewe to Bournemouth. Years of storage had already taken their toll, and the journey itself exposed further corrosion. By the time it arrived at Trickett Welding, it was clear that extensive structural repairs would be required before it could safely return to the road.
1. The Starting Point
Although complete and full of character, the Jaguar arrived bearing the unmistakable signs of decades in storage. Time, moisture and long-term inactivity had left corrosion throughout the body, and closer inspection quickly revealed that the rust extended far beyond what was immediately visible.
As with many classic cars that have spent years off the road, the challenge wasn’t simply repairing the obvious holes. It was systematically uncovering every affected area, preserving as much original metal as possible and rebuilding the bodyshell to factory standards without compromising its originality.
2. Initial Assessment
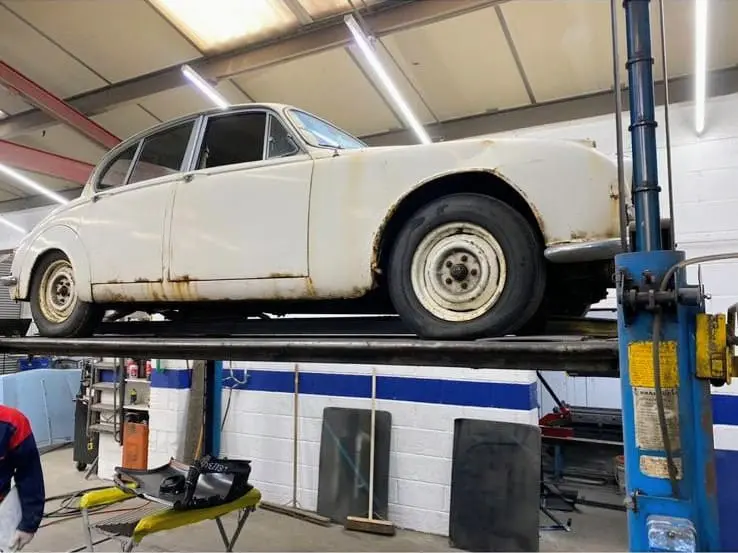
Once the Jaguar was safely in our workshop, a comprehensive inspection was carried out to establish exactly what we were dealing with. While the exterior clearly reflected years of storage, a closer examination revealed that its condition was considerably worse than first anticipated.
The paintwork had deteriorated significantly, with corrosion visible across much of the body. As is often the case with vehicles that have spent many years off the road, however, the visible rust proved to be only part of the story. A detailed inspection uncovered extensive corrosion within structural sections of the bodyshell and chassis, confirming that this would require a comprehensive programme of fabrication and welding rather than cosmetic repair alone.
Mechanically, the years of inactivity had taken an equally heavy toll. Before the Jaguar could return to the road, every major system would need to be assessed, repaired or refurbished to ensure the finished vehicle was not only visually impressive, but also safe, reliable and enjoyable to drive.
This detailed assessment allowed us to develop a structured restoration plan, identifying every area requiring attention before work commenced and ensuring the project could progress methodically from start to finish.
3. Stripping Begins
Only once dismantling began could the true extent of the restoration be understood. As components were removed, areas that had been hidden for decades were exposed, allowing us to accurately assess the condition of the underlying structure.
This marked the beginning of the strip-down process, laying the foundations for the entire restoration and revealing exactly what fabrication and welding work would be required before rebuilding could begin.
4. Engine Removal
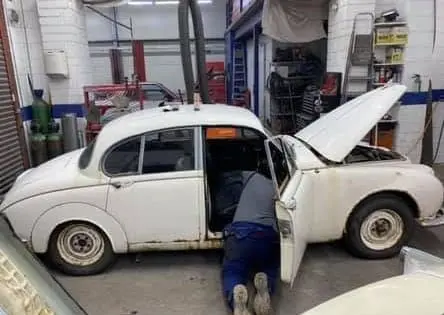
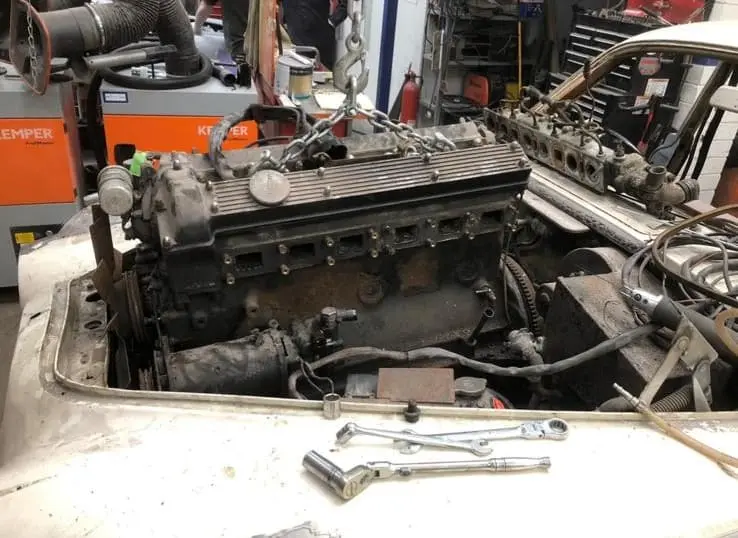
The next stage focused on removing the seized engine. By this point, we had already established that it was a non-runner, having seized solid after many years out of use.
Once removed from the vehicle and dismantled, the full extent of the internal damage became apparent. Following a detailed assessment, it was clear that rebuilding the original engine would not be economically viable. After discussing the available options with Steve, the decision was made to source a suitable replacement engine of the correct specification, ensuring the Jaguar could return to the road with reliable mechanicals.
The mechanical work extended far beyond the engine itself. The braking system required a complete overhaul, while the suspension components had also deteriorated significantly through age and prolonged inactivity. As with the structural restoration, the objective was to return the Jaguar to a condition where it was not only visually stunning but also dependable, safe and enjoyable to drive.
5. Stripping the Interior
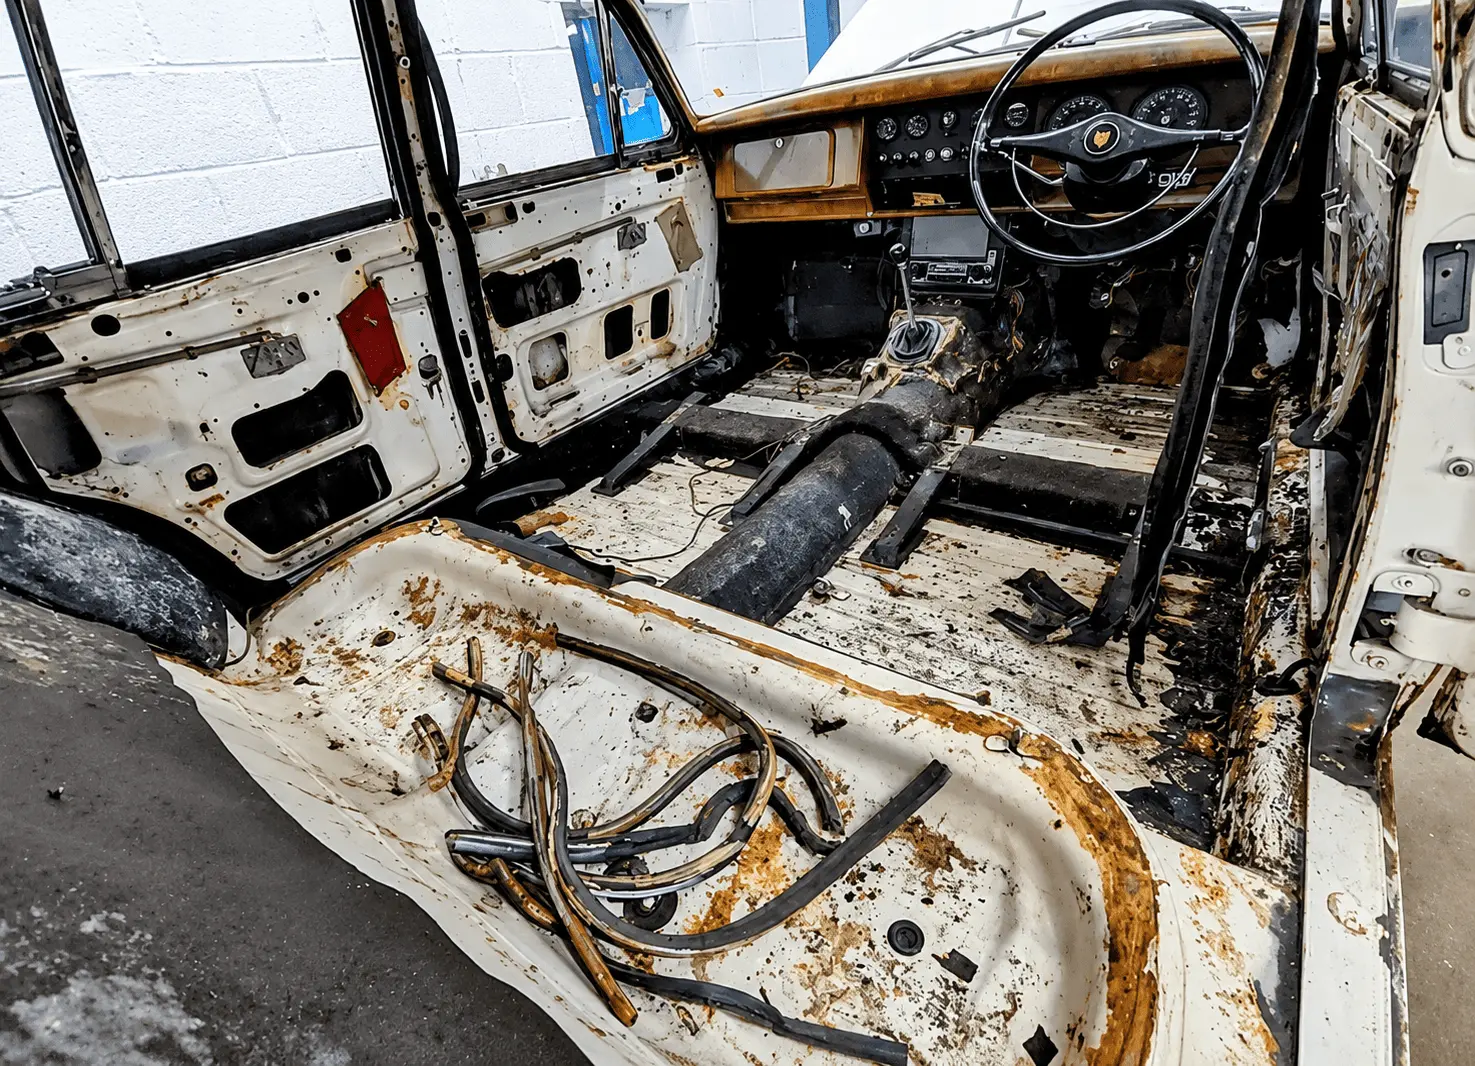
Work then progressed to the interior. Every component was removed, with the trim being sent to a trusted local specialist for refurbishment while work continued on the bodyshell.
Removing the interior is a vital stage of any restoration, as it exposes areas that are otherwise completely hidden from view. With the carpets, sound deadening and trim removed, the floor pans, inner sills, transmission tunnel and other structural sections could be inspected from inside the vehicle for the first time.
Only at this stage was it possible to accurately assess the full extent of the corrosion and plan the structural repairs. With the bodyshell stripped back and every affected area identified, preparations could begin for the fabrication and welding work that would form the backbone of the restoration.
6. Accessing the Engine Bay
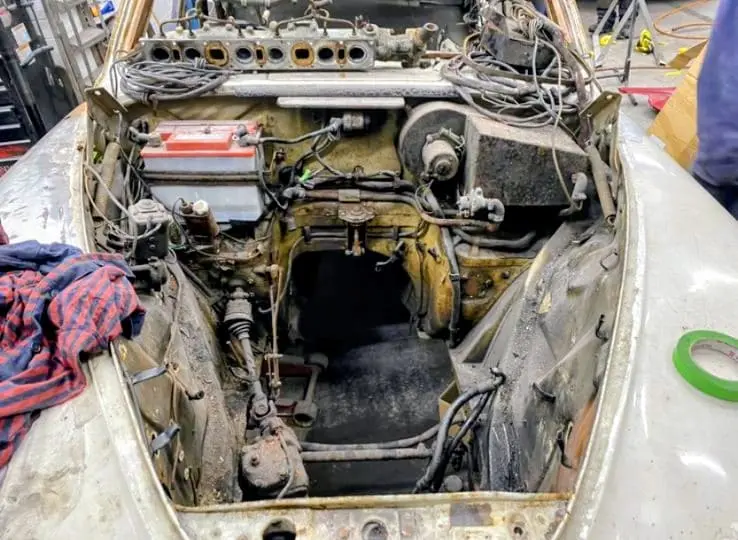
Removing the engine and gearbox provided unrestricted access to the engine bay for the first time. Years of accumulated grime, corrosion and ageing components had previously concealed much of the area’s condition, but with everything stripped away, a thorough inspection could finally be carried out.
Every ancillary component was assessed to determine whether it could be cleaned and refurbished, repaired, or whether replacement would provide the most reliable long-term solution. With the engine bay now fully exposed, restoration work could begin before the replacement engine and gearbox were installed later in the project.
7. Bracing the Bodyshell
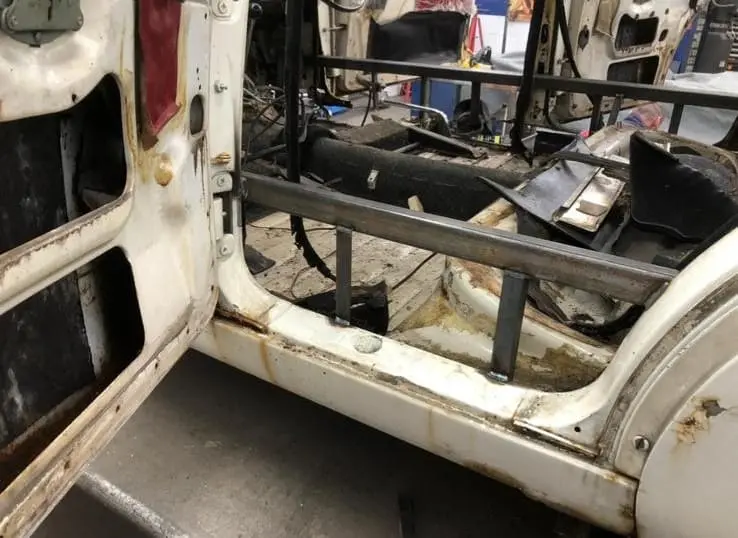
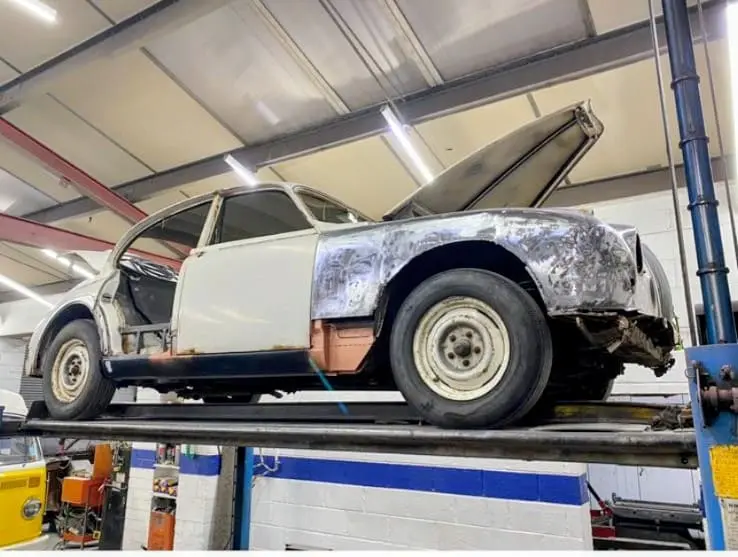
Before any major structural repairs could begin, the bodyshell first had to be stabilised. With significant sections of corroded steel requiring removal, there was a real risk of the shell moving or distorting, affecting the fit of the doors, panels and the overall integrity of the vehicle.
To prevent this, a series of steel braces were fabricated and welded across the door apertures, tying together the A, B and C pillars while reinforcing the sill openings.
Additional bracing was also welded to the lift platform, creating a rigid support structure that maintained the bodyshell’s alignment throughout the restoration.
Although temporary, this framework played a critical role in ensuring every structural repair could be completed accurately, allowing the Jaguar to retain its original shape and panel alignment as new sections were fabricated and welded into place.
8. Removing the Corrosion
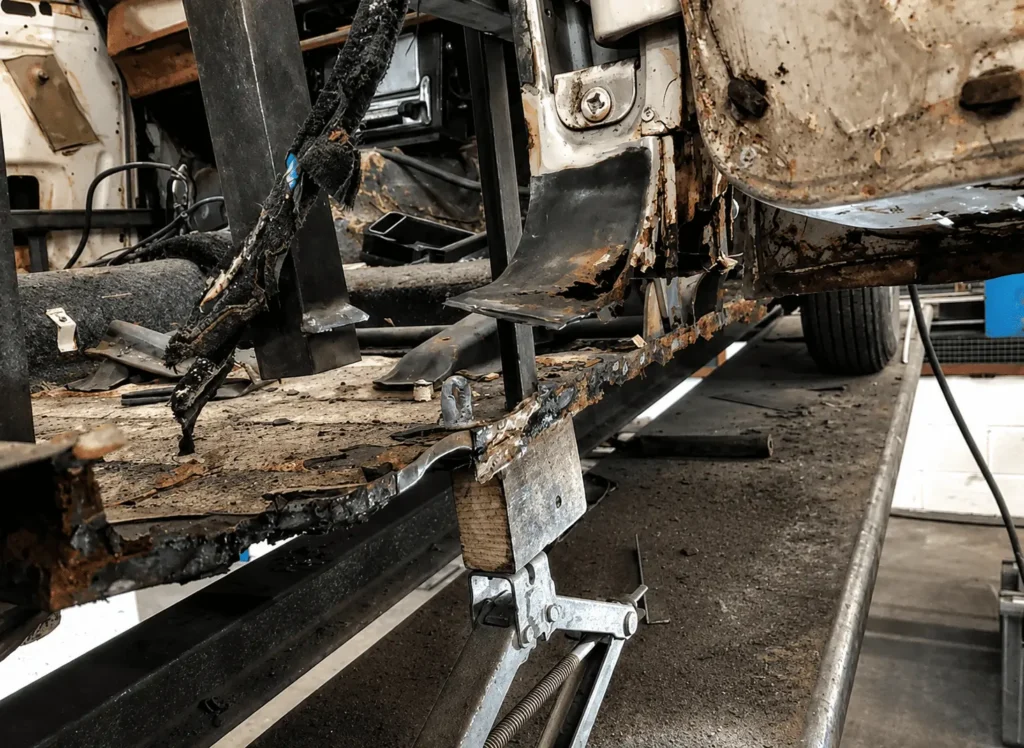
One of the defining principles of any quality restoration is the complete removal of corroded metalwork. While it can be tempting to simply plate over rust to save time and money, doing so only conceals the problem rather than solving it. At Trickett Welding, we believe in repairing vehicles properly, ensuring every trace of corrosion is eliminated before any new metal is introduced.
With the bodyshell securely braced, the affected sections could be cut away, exposing the full extent of the damage and leaving only clean, solid steel to work from. Depending on the area being repaired, replacement panels were either sourced from specialist suppliers or hand-fabricated in-house to replicate the original Jaguar pressings and profiles as closely as possible.
Only once every corroded section had been removed could the process of rebuilding the Jaguar’s structure begin, providing a solid foundation for the next stage of the restoration.
9. Core Strength
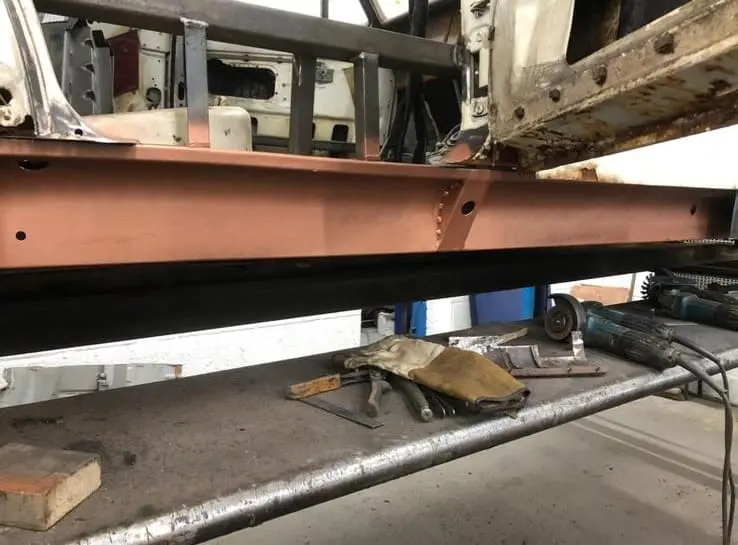
Rebuilding the Jaguar’s structure could now begin. Although these inner sections would never be seen once the vehicle was complete, they are fundamental to the strength and integrity of the bodyshell.
Before each section was welded into place, the mating surfaces were treated with a zinc-rich weld-through primer. This provides long-term corrosion protection between overlapping panels, helping to prevent rust from developing in areas that become inaccessible once the repairs are complete.
Each repair section was carefully aligned before being welded into position, restoring the Jaguar’s structural integrity and creating a solid foundation for the outer body panels that would follow.
10. Restoring the Bodywork
11. Protecting the Hidden Areas
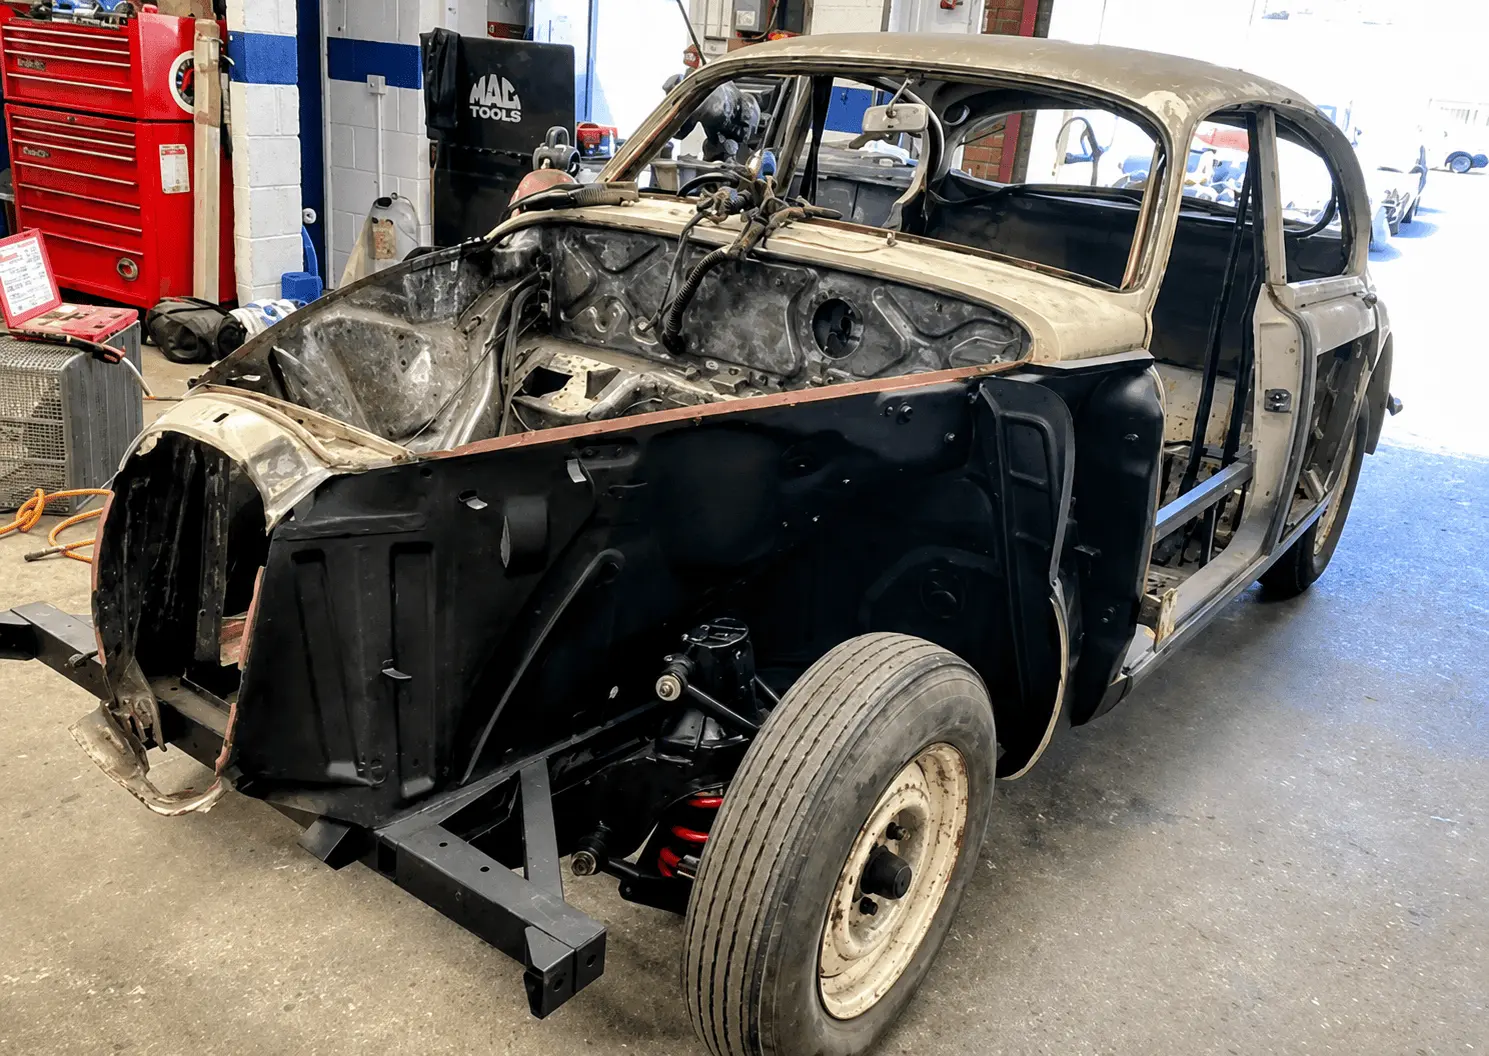
With the front wings removed for preparation by our bodyshop team, unrestricted access was gained to the inner wings and wheel arch areas. This also provided the opportunity to inspect and repair any remaining corrosion that would once again become inaccessible after the vehicle was reassembled.
Once the welding repairs had been completed, these areas were prepared before being coated in a high-quality stone chip finish. As well as replicating the original appearance, this durable coating provides long-term protection against moisture, road debris and the elements, helping to safeguard the Jaguar for many years to come.
12. Returning to Bare Metal
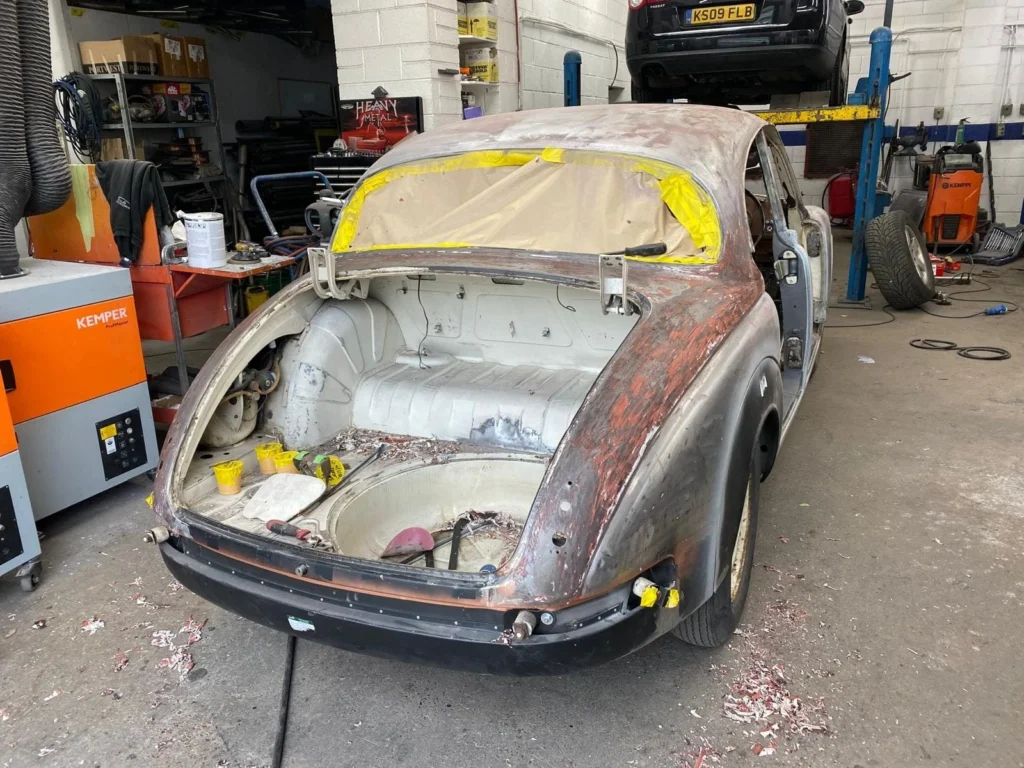
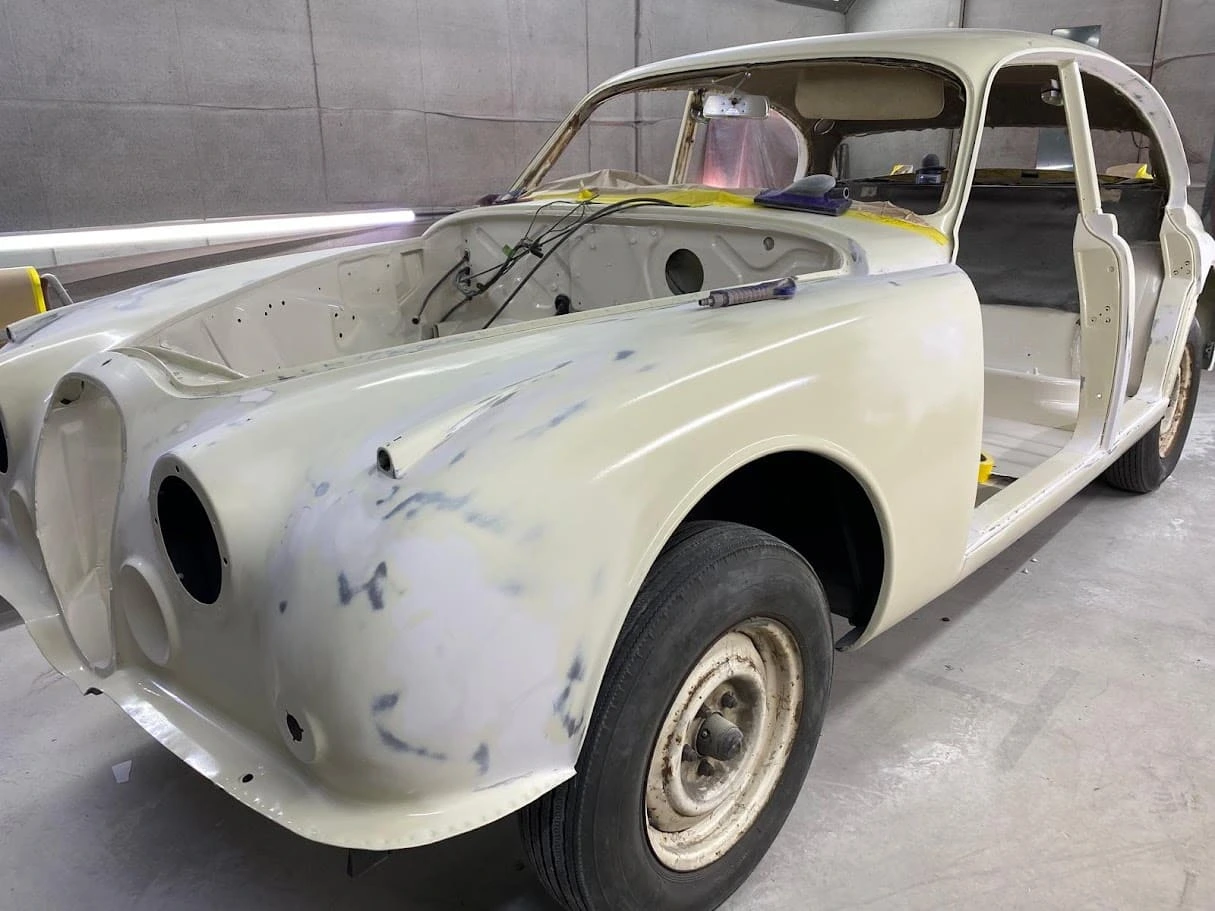
With the structural repairs complete, the focus shifted from rebuilding the Jaguar to preparing it for its new lease of life. The entire bodyshell was painstakingly stripped back to bare metal, both inside and out, removing decades of old paint, previous repairs and surface corrosion.
Taking the shell back to bare steel is an essential part of any high-quality restoration. It reveals any remaining imperfections that may have been hidden beneath previous paintwork and provides the perfect foundation for the bodyshop team to carry out the final metal finishing before the priming and paint preparation stages.
13. Epoxy Priming and Metal Finishing
After the bodyshell had been stripped back to bare metal, it was coated in a two-pack epoxy primer. Unlike conventional primers, epoxy provides excellent adhesion and corrosion resistance, sealing the freshly exposed steel and protecting it while the remaining body preparation work is completed.
With the steel fully protected, the bodyshop team could begin the detailed process of metal finishing and fine filler work. This stage is dedicated to creating perfectly straight, flowing panels by refining every surface and eliminating even the smallest imperfections before the vehicle progresses to high-build primer and the final stages of paint preparation.
14. Achieving Perfect Panel Gaps
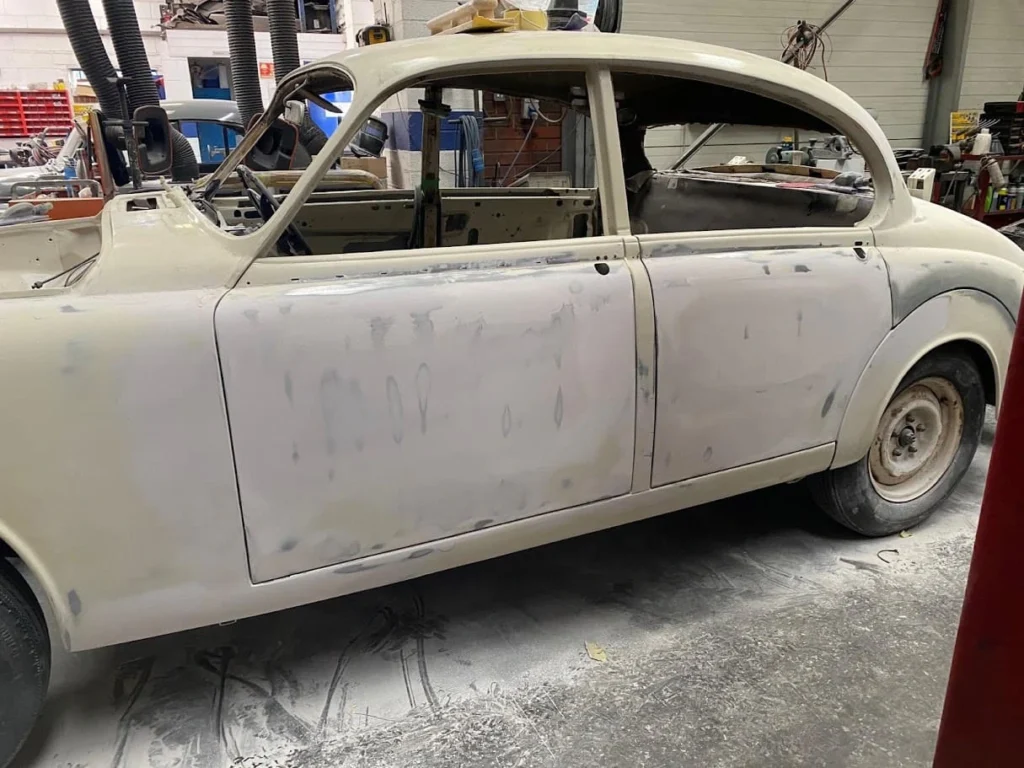
Before the Jaguar could move any closer to the paint booth, the doors, wings and other body panels were temporarily refitted to check their fit and alignment. This is a critical stage of any high-quality restoration, as even the finest paintwork cannot disguise poorly fitting panels.
Where necessary, the edges of the doors were built up by welding before being hand-shaped and sanded to achieve an exact fit. This traditional coachbuilding technique allows extremely fine adjustments to be made, producing crisp, even panel gaps that simply cannot be achieved through adjustment or filler alone.
It is a time-consuming process requiring patience, precision and craftsmanship, but the result is a Jaguar that not only looks right, but reflects the quality and attention to detail invested throughout the restoration.
15. High-Build Primer
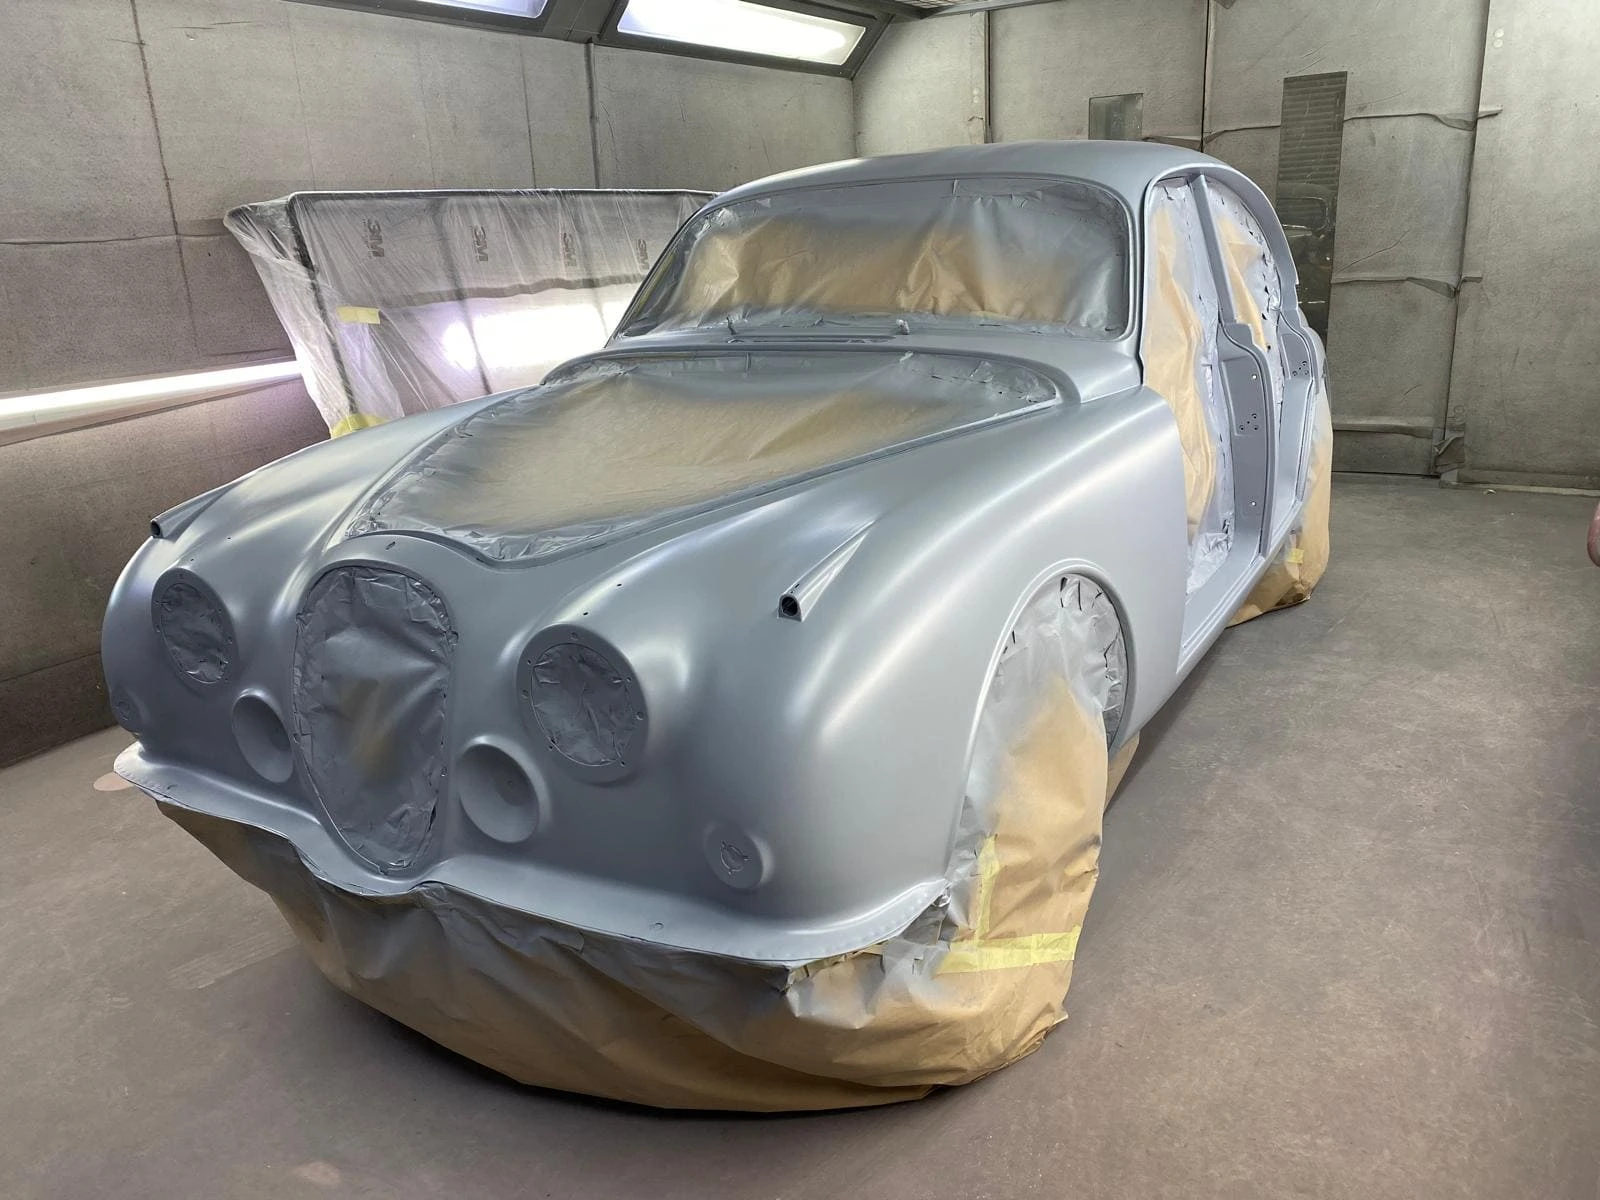
Following the completion of the welding, metal finishing and initial body preparation, the bodyshell and all loose panels were thoroughly cleaned, masked and coated in a high-build primer. This creates a uniform surface across the entire vehicle, making it far easier to identify and correct any remaining minor imperfections before the colour coats are applied.
The high-build primer also provides sufficient film thickness for the bodyshell to be hand flatted. This labour-intensive process removes the slightest surface irregularities, leaving every panel perfectly smooth and creating the foundation for the exceptional finish that follows.
16. Hand Flatting and Final Inspection
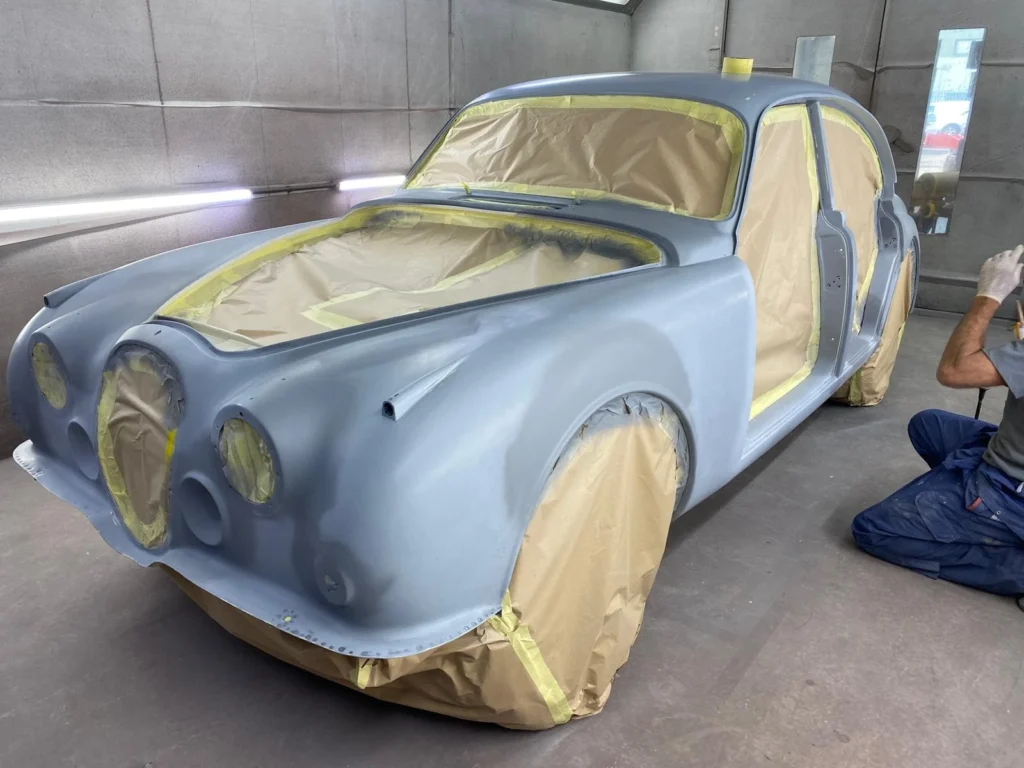
Once the high-build primer had fully cured, the entire bodyshell was hand flatted. It is one of the most demanding stages of the restoration, requiring patience, skill and an uncompromising eye for detail.
Every panel was sanded by hand to remove even the slightest imperfections, ensuring the bodywork was perfectly straight and the surfaces flowed seamlessly from one panel to the next. Throughout the process, the shell was repeatedly inspected under workshop lighting to identify and rectify any remaining defects before the final colour coats were applied.
Only when every panel met our exacting standards was the Jaguar ready to receive its exterior finish.
17. Colouring the Interior
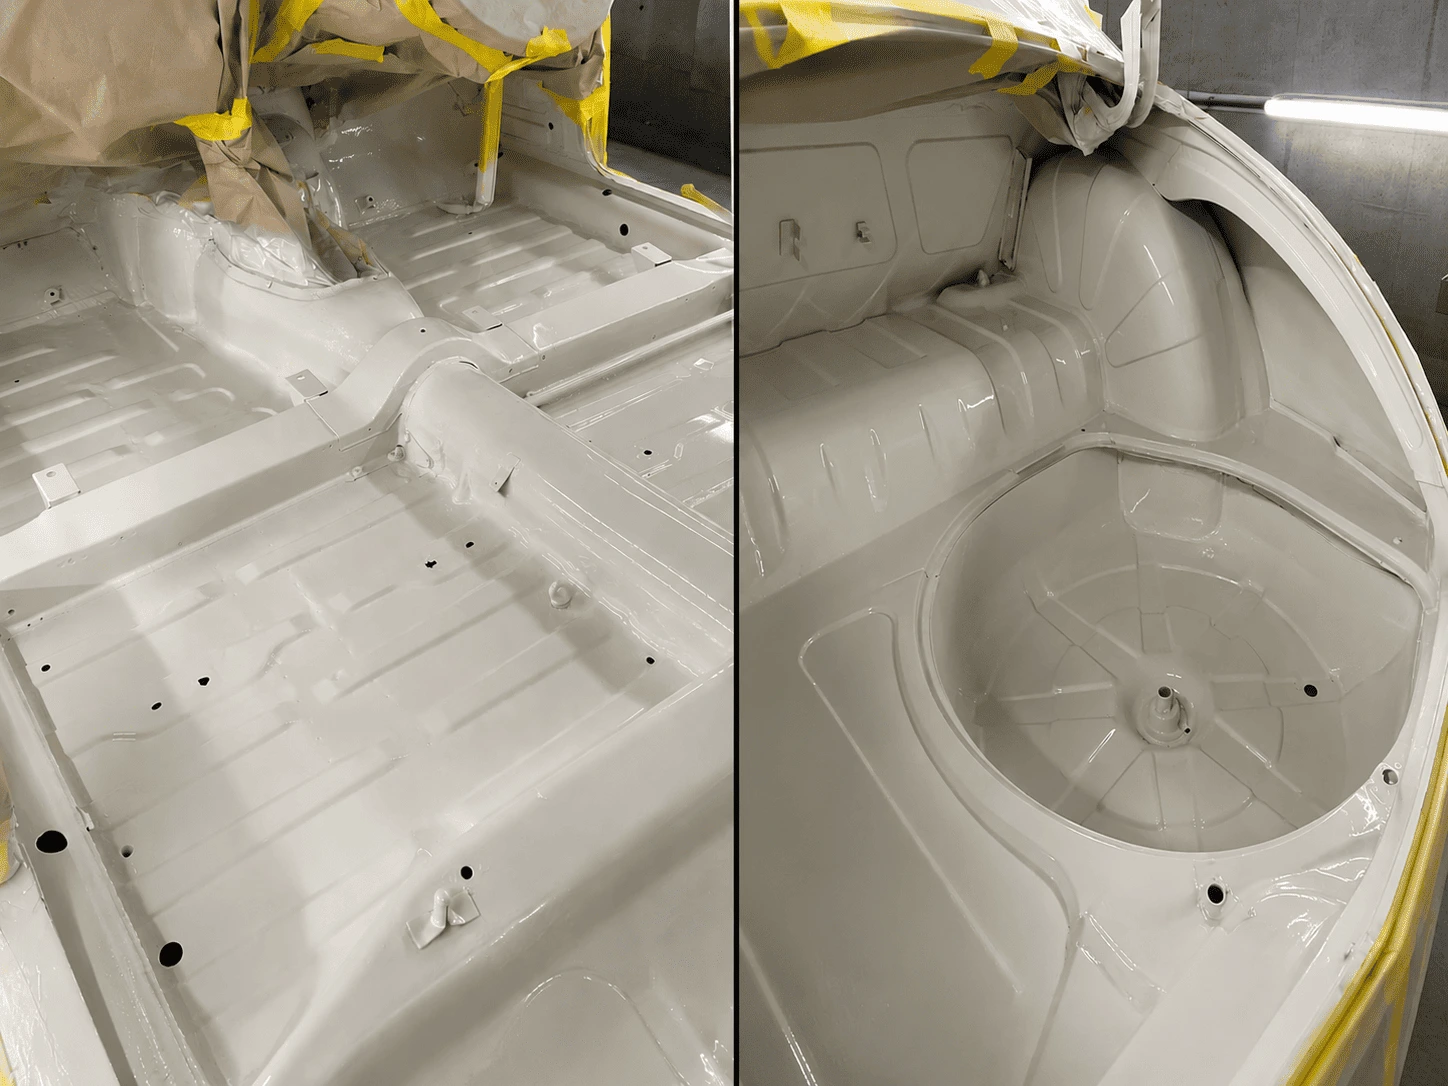
Before the exterior of the Jaguar received its colour coats, the interior of the bodyshell was completed first. Areas including the floor pans, transmission tunnel, rear compartment and boot were all refinished to the same exacting standard as the visible exterior panels.
Although these areas are largely hidden once the vehicle is reassembled, they are an integral part of any thorough restoration. Every surface was properly prepared before being painted, creating a durable, high-quality finish throughout the entire bodyshell rather than concentrating solely on the areas that remain visible.
The result is a Jaguar that is just as impressive beneath the carpets and inside the boot as it is on the outside—a reflection of a restoration completed properly from the inside out.
18. Preparing the Engine Bay
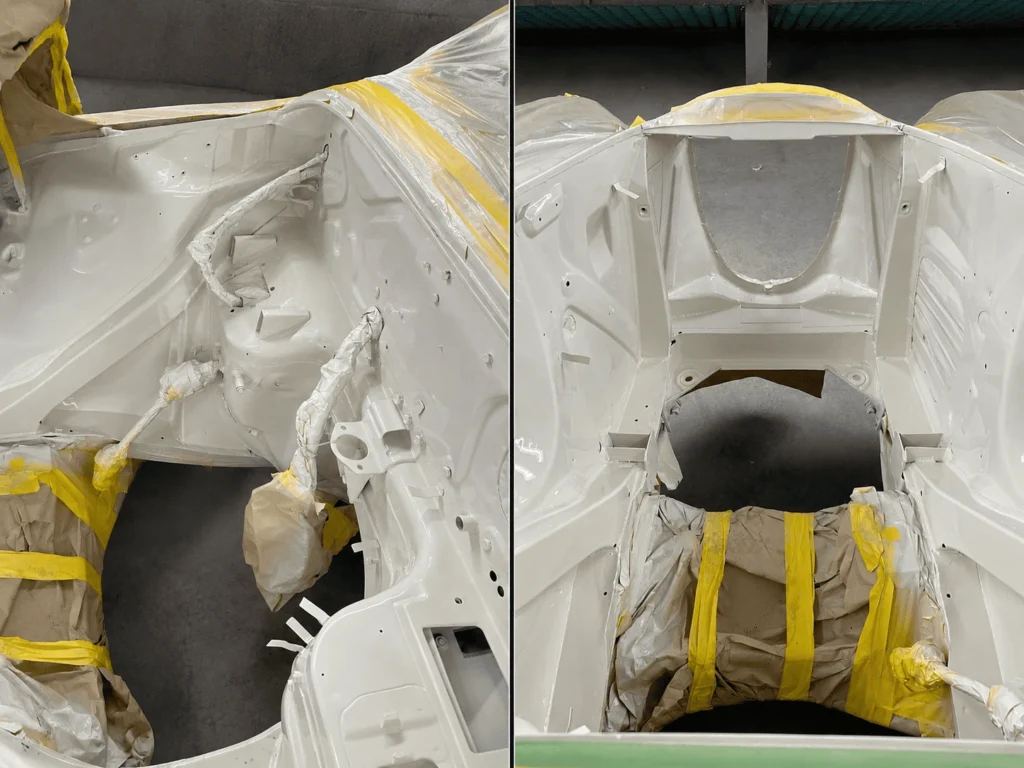
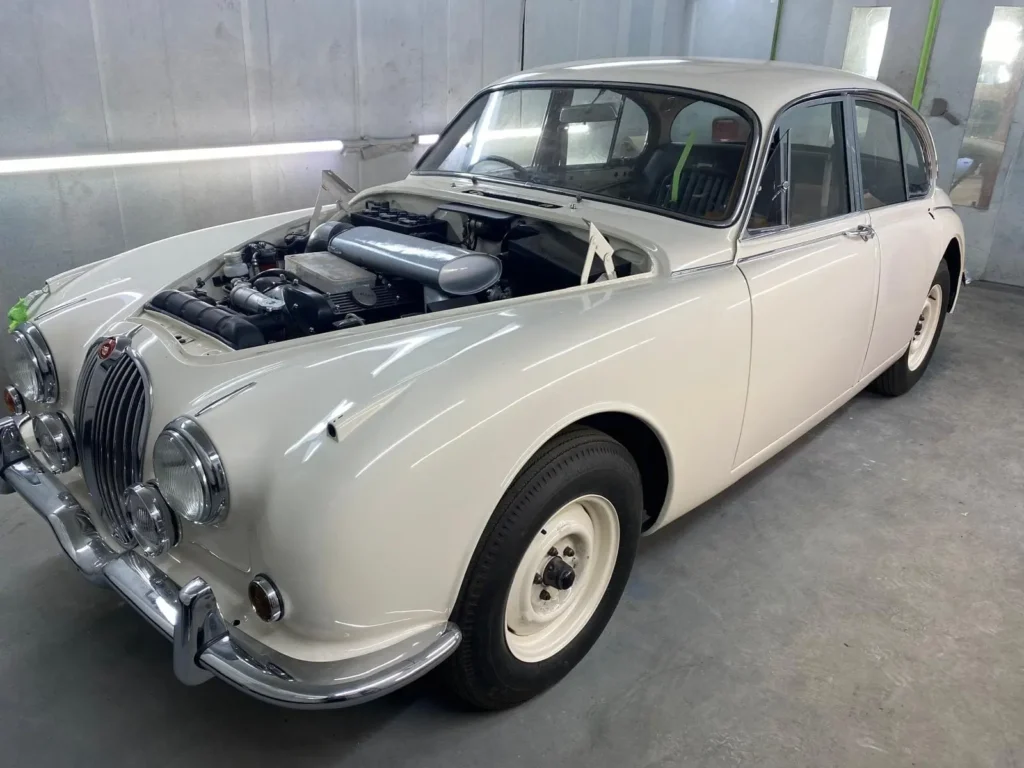
The same approach was taken with the engine bay. Once the fabrication work had been completed and the area fully prepared, it was refinished to the same standard as the rest of the bodyshell, ensuring every surface was protected before reassembly began.
Painting the engine bay at this stage allows every bracket, pipe, wiring loom and ancillary component to be installed onto a fully finished surface rather than painting around them later. The result is a cleaner, more authentic appearance while ensuring every part of the engine bay receives the same level of attention as the rest of the vehicle.
With the interior and engine bay now complete, the bodyshell was fully prepared for the application of its exterior finish.
19. Exterior Paintwork
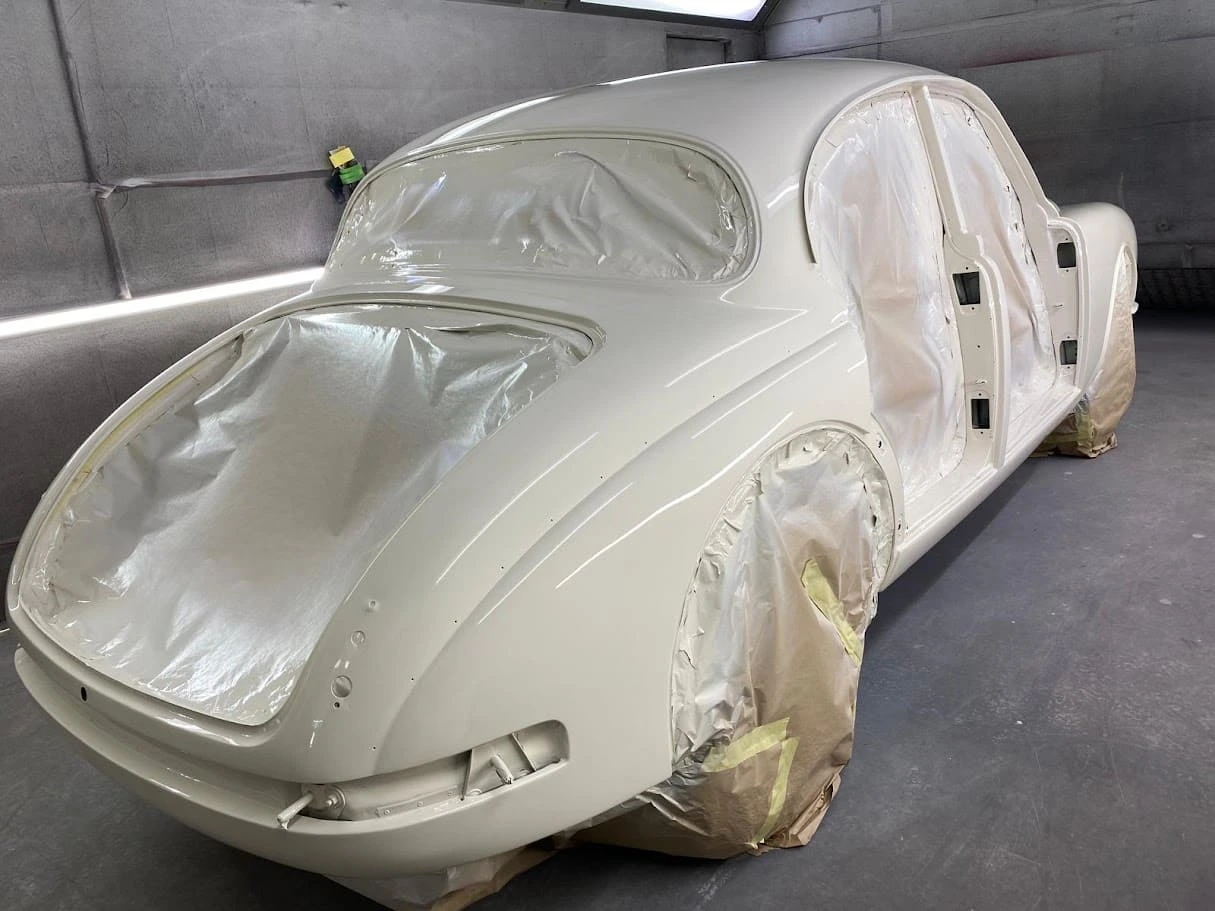
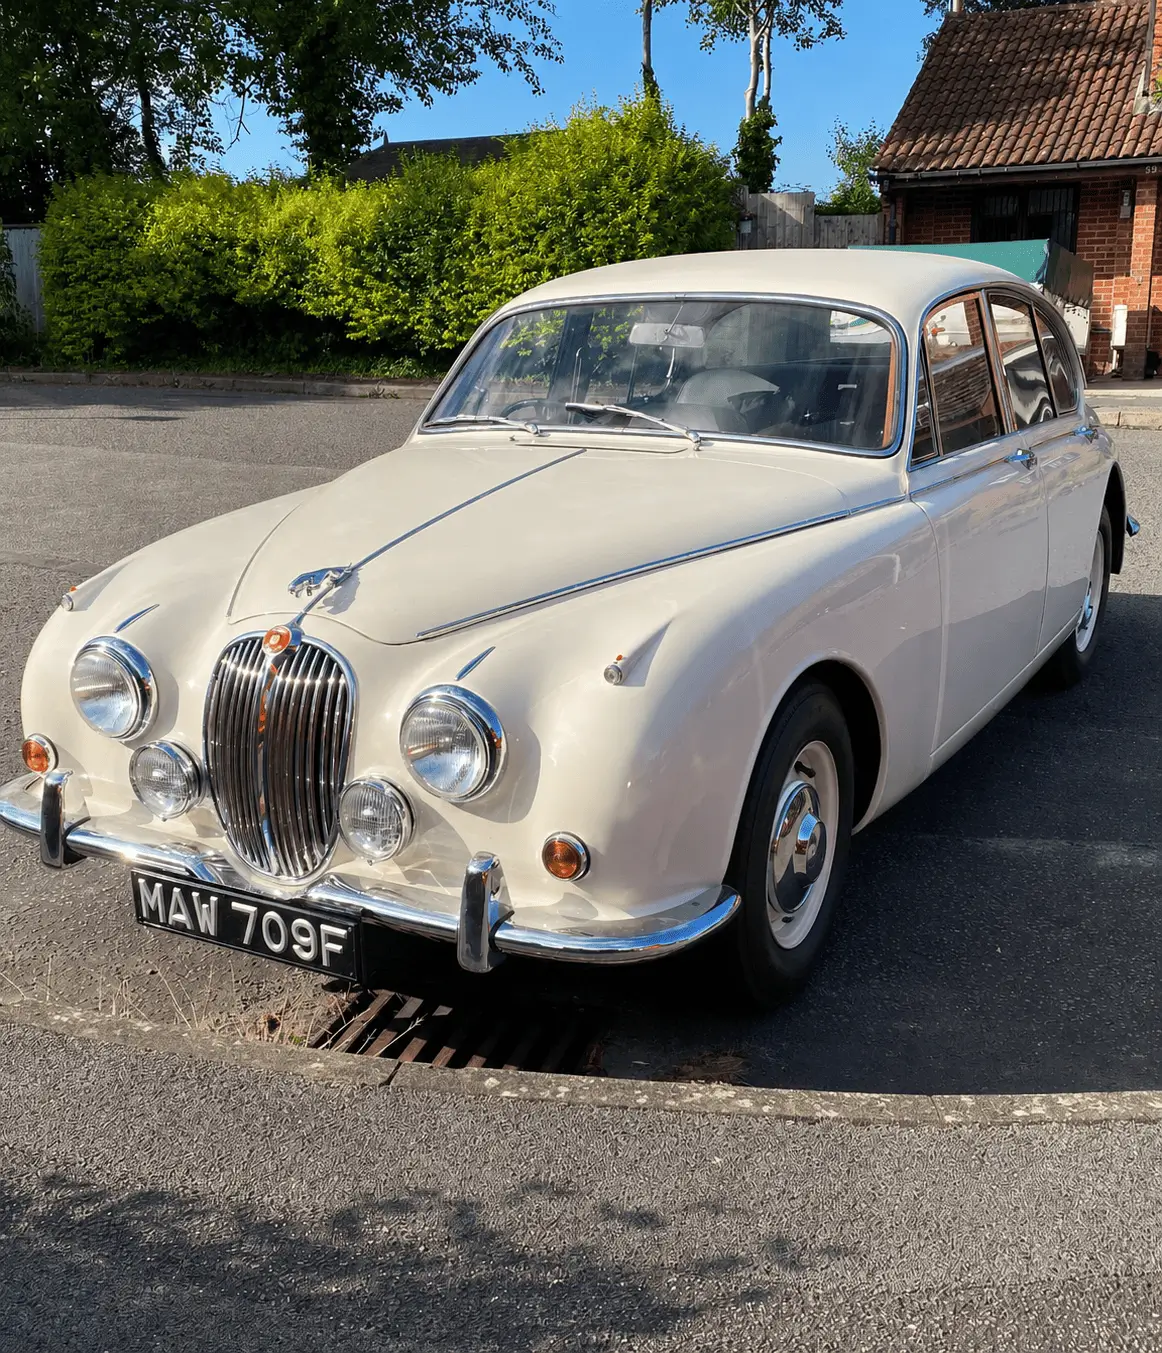
After many months of structural repairs, fabrication, body preparation and hand finishing, the Jaguar finally reached one of the most rewarding milestones of the restoration—the application of its original Old English White exterior finish.
Every panel had been meticulously prepared before entering the paint booth, resulting in a deep, even finish that highlighted the countless hours invested in achieving perfectly straight panels, crisp body lines and uniform panel gaps.
Seeing the bodyshell in its original colour for the first time marked a significant turning point in the project. After arriving as a tired, heavily corroded shell, the Jaguar was once again beginning to resemble the elegant sporting saloon that had left the factory more than sixty years earlier.
20. The Rebuild Begins
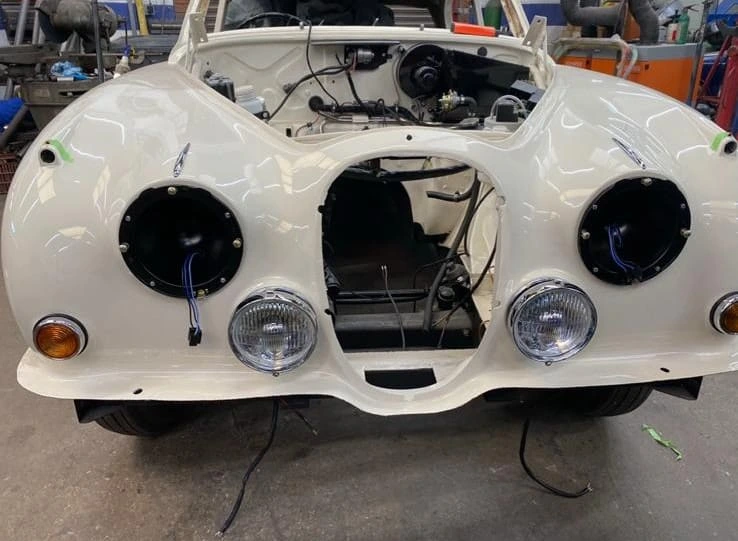
With the paintwork complete, the project entered the reassembly phase. Every component was inspected before refitting, with original parts refurbished wherever practical. Where replacements were required, we selected either high-quality new old stock (NOS) components or carefully chosen reproduction parts that met the standards expected of a restoration of this calibre.
Reassembly was carried out methodically, ensuring each component could be installed without compromising the freshly refinished bodyshell. During this stage, the braking system and suspension were comprehensively overhauled, providing the Jaguar with the reliability, safety and driving characteristics expected of a fully restored classic.
As the rolling chassis began to take shape once again, the transformation from painted bodyshell to complete motor car was well underway.
21. Installing the Replacement Engine
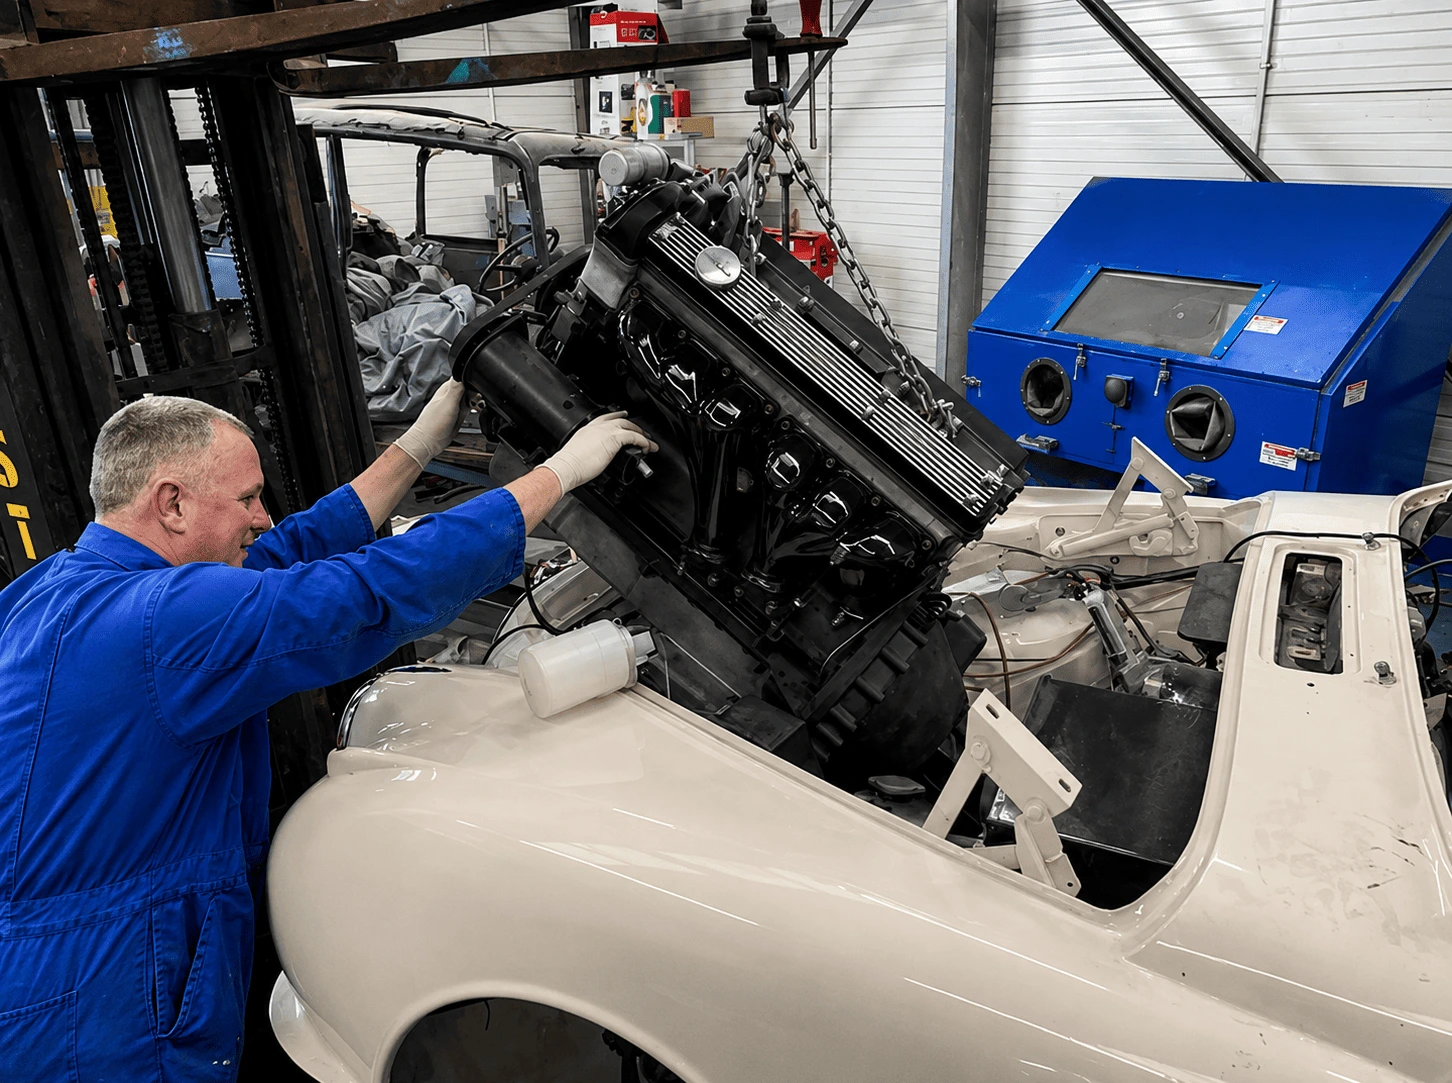
One of the most significant milestones of the rebuild was the installation of the replacement engine.
Early in the restoration it became clear that the Jaguar’s original engine was beyond economical repair. Rather than investing in a costly rebuild, a replacement unit of the correct specification was sourced. Having already been professionally rebuilt, cleaned and refinished, it was in superb condition and perfectly complemented the freshly restored engine bay.
Installing the engine demanded careful planning and precise handling to avoid damaging the newly painted bodywork. Once in place, the remaining mechanical systems and ancillary components could be installed as the rebuild gathered momentum.
22. Reassembly Continues
23. A Cabin Worthy of the Restoration
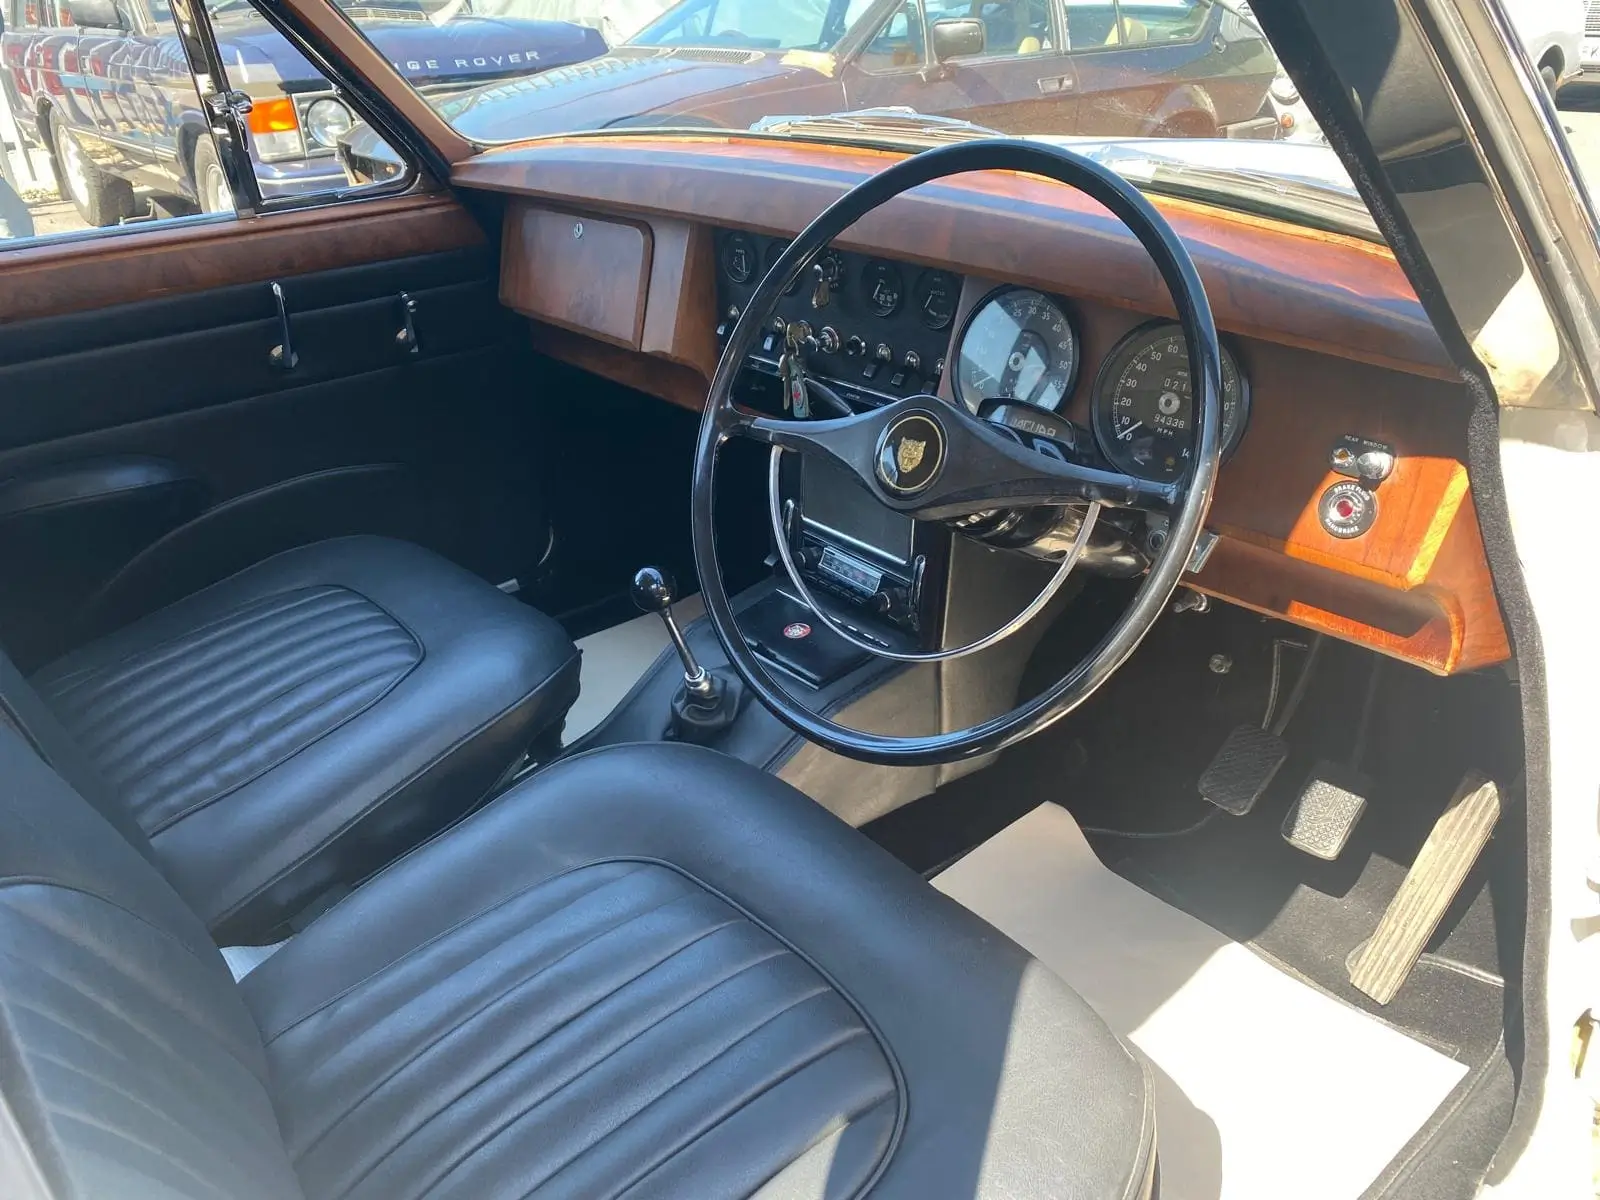
The final stage of the physical restoration was the installation of the beautifully refurbished interior. The retrimmed leather seats, new carpets, headlining, restored dashboard, wood veneers, steering wheel and door trims combined to recreate the luxurious cabin that helped establish the Jaguar Mk2 as one of the finest sporting saloons of its era.
The same level of care invested in the bodyshell and mechanical restoration was applied inside the vehicle. Every component was fitted and aligned to ensure the quality of the interior matched the exceptional standard achieved throughout the rest of the project.
With the cabin complete, the Jaguar once again offered the blend of luxury, craftsmanship and sporting character for which it became renowned.
24. Ready for the Road Once Again
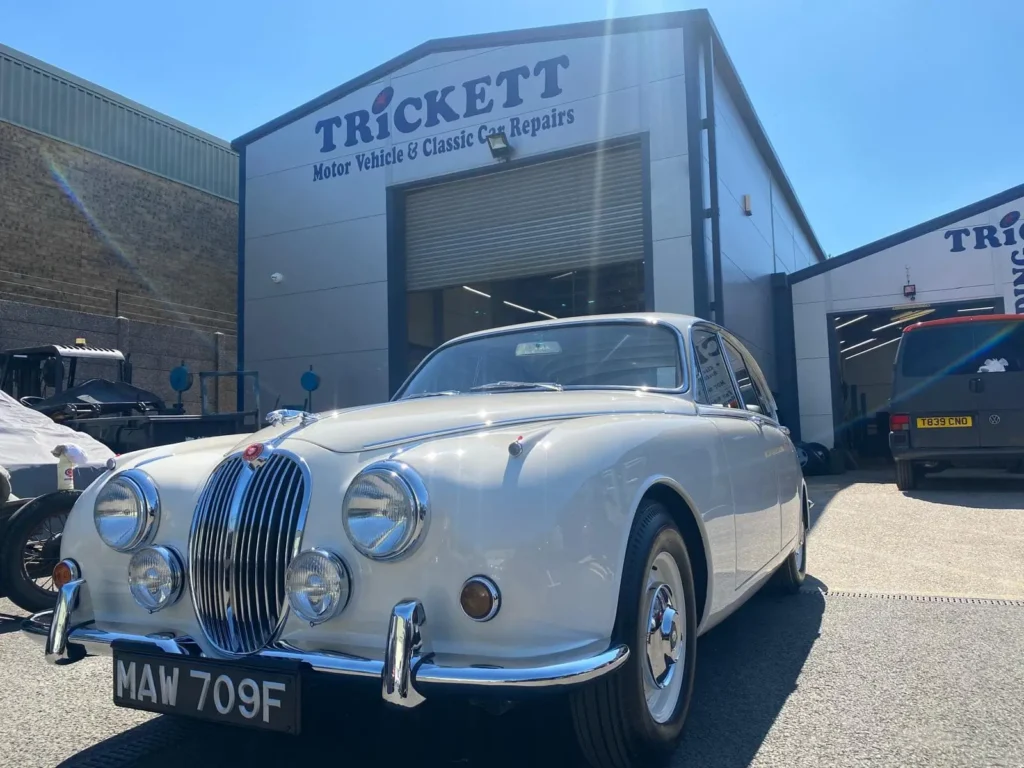
The restoration was now complete. Every component had been installed, adjusted and checked to ensure it performed exactly as intended. The braking system, steering, suspension and electrical systems were thoroughly tested, while the wheel alignment was set to factory specification to ensure the Jaguar drove every bit as well as it looked.
Months of skilled craftsmanship had transformed a tired, corrosion-ridden project into an elegant sporting saloon, restored with respect for its originality and prepared to provide many more years of enjoyment.
Following comprehensive testing and final quality checks, the Jaguar was ready to return home.
25. Home at Last
After months of dedicated restoration work, the Jaguar was finally returned to Steve and his family. What had arrived as a severely corroded, non-running project had been transformed back into the elegant sporting saloon it once was, ready to create new memories for many years to come.
The story had come full circle. Having originally served as an executive vehicle for the Rolls-Royce Motor Company before passing to Steve’s late uncle, the Jaguar was once again back on the road where it belonged. From the outset, one of Steve’s ambitions had been to use the car for his son’s school prom, allowing another generation to enjoy a vehicle that had remained part of his family’s history for so many years.
Steve later summed up the restoration perfectly:
“After speaking to Nigel and hearing his obvious passion for cars, the decision was made for the Jaguar to enter his workshop – and what a transformation occurred. The car is now back on the road and has recently been used for my son’s school prom. Thank you to Nigel and the team for everything they’ve done.”
 01202 625050
 info@trickettwelding.co.uk